
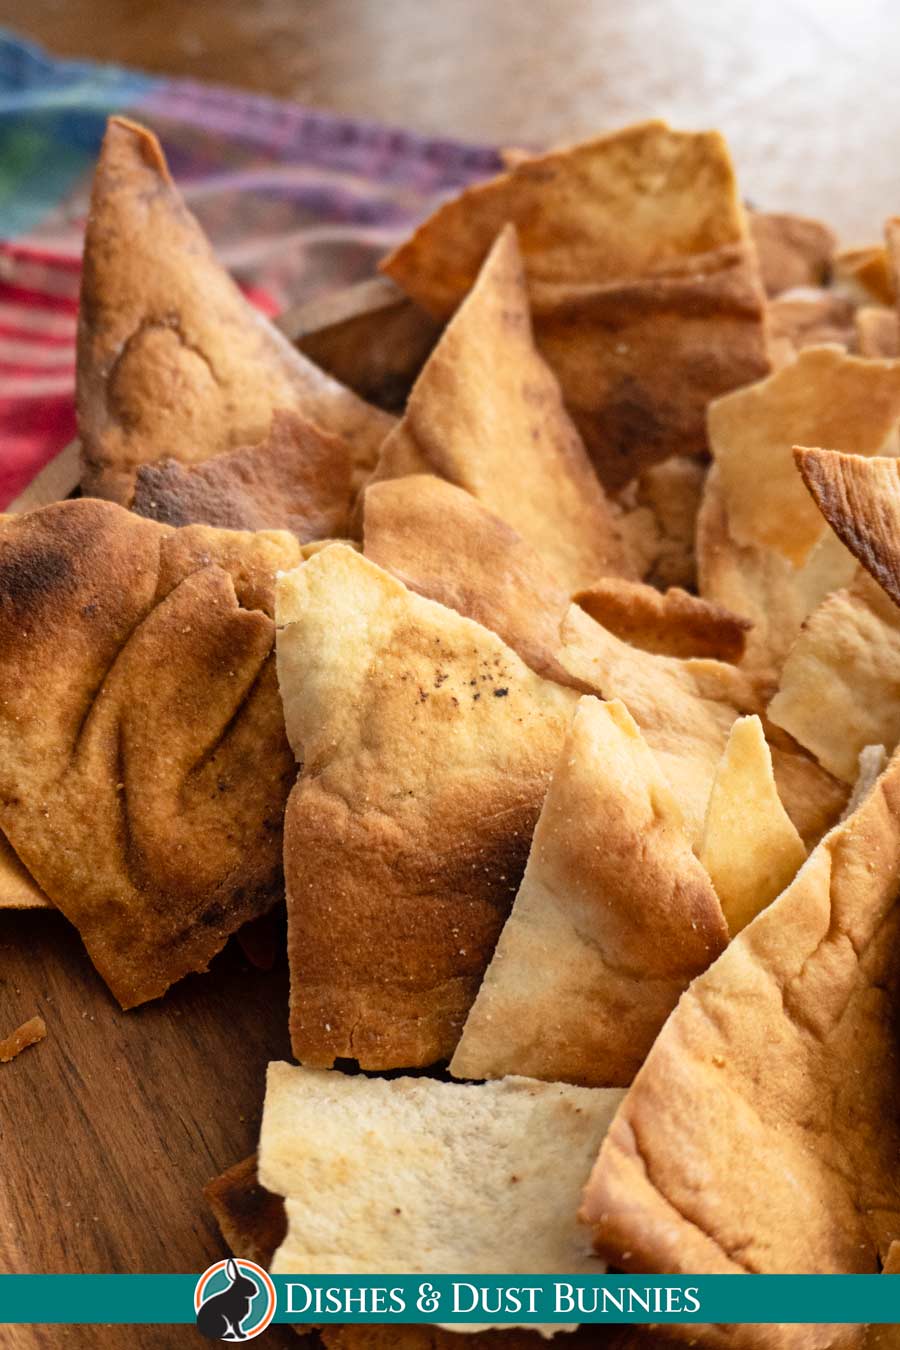
How to Make Homemade Pita Chips
These homemade baked pita chips are the perfect snack cuisine to help you attack your cravings head-on. It's super easy to make pita chips in your own oven and they taste delicious combining the crunch of crispy chips and the flavors of olive oil and sea salt making them favorite snacks for when you need something tasty to keep you going. Plus, they're a great way to use up any leftover pita bread you might have lying around. So give them a try today and see just how surprisingly yummy these healthy pita chips can be!

Are homemade pita chips healthy?
Yes! Pita chips are a great way to get your daily dose of fiber and whole grains. Plus these baked chips are low in calories and fat. And that's just talking about the basic chip by itself, for additional health benefits you can pair pita chips with healthy dips such as roasted red pepper hummus, eggplant dip, or even avocado dip.
In addition, homemade pita chips are a healthier alternative to store bought potato chips since they lack the unhealthy additives, preservatives and sugars found in commercial chips.
Snack happy people will find making this pita chips recipe to be equally yummy but significantly healthier than commercial chips. So you can have it more often without the guilt!

Be sure to see the recipe card at the bottom of the post for full ingredients & instructions!
What kind of pita should I use for homemade chips?
There are many types of pitas out there, but for chips you'll want to use a white or wheat pita. For a gluten-free option, try using a corn tortilla instead.
Are pita chips gluten free?
It is rare for store bought pita chips to be gluten free as they contain wheat. When making your own homemade pita chips, for a gluten free alternative try using corn tortillas instead of pita bread.
Are homemade Pita Chips baked or fried?
Baked, of course! Baked Pita Chips are so much healthier for you than their fried counterparts. And homemade baked pita chips are just as delicious, just as crispy and just as addictive as fried chips. Making your own pita chips is a perfect alternative for store bought chips.

What are homemade pita chips made from?
Pita chips are made from pita bread that has been cut into small pieces and then fried or baked.
Homemade pita chips are a super simple recipe and they taste great. All you need to make pita chips is some pita bread and a little olive oil. Serve with your favorite dips, a sprinkle of sea salt or naked as they are! 😜
The pita bread itself is a soft, round flatbread that's popular in Mediterranean and Middle Eastern cuisine. It's usually made from wheat flour, water, yeast, and salt. But when you bake the soft pita bread it transforms into crunchy pita chips!
Pita bread is traditionally baked in a hot oven on a baking stone or metal sheet. This helps to create the characteristic puffy pockets that make pita bread so distinctive from other breads.

Be sure to see the recipe card at the bottom of the post for full ingredients & instructions!
How to make homemade Pita Chips – Overview
You can find the full recipe details, including ingredient amounts and the full instructions in the recipe card at the bottom of this post, but first, here's a quick overview of how to make homemade baked pita chips!
Pita chips are very easy to make!
First, begin by opening the pita pocket and separate the two sides. This will create thinner chips or you can leave the two sides together for thicker chips. It's up to you!
Next, cut pita bread into 8 triangles using a sharp knife or kitchen scissors.
In a small bowl, mix together olive oil and sea salt.
Place pita triangles on a prepared baking sheet, lined with parchment paper, and brush with olive oil mixture using a pastry brush.
Bake them in a preheated oven at 375°F for 10-12 minutes or until chips are golden brown and crispy. Cool completely before serving.
Can I make Pita Chips in an air fryer?
To make pita chips in an air fryer, start by cutting pita bread into small wedges. Then, brush the wedges with olive oil and sprinkle with salt. Place the wedges in the air fryer basket in a single layer and cook at 400 degrees for 3-5 minutes, or until golden brown.
Once they are done, remove the crispy homemade pita chips from the air fryer and enjoy your crispy chips! You can further dip them in your favorite sauce, garlic powder or dip.
Be sure to see the recipe card at the bottom of the post for full ingredients & instructions!
Pita Chip Recipe Variations
The base flavor of the olive oil makes these crispy homemade pita chips an addictive snack by themselves but there is always room to get creative when it comes to flavoring your homemade pita chips! Here are some ideas:
- For a cheesy twist, sprinkle some grated Parmesan cheese on top of the chips before baking.
- For a bit of spice, add a pinch (or more!) of chili powder to the chips before baking.
- For a sweeter option, try dipping the baked pita chips in honey or sprinkling them with cinnamon sugar.
- Try using whole wheat pita bread, garlic powder or garlic-flavored pita, or mini pita rounds.
- To bring that “everything bagel” flavor to your baked pita chips try adding some toasted sesame seeds, poppy seeds, some kosher salt and a little garlic powder or onion powder.
How to Store Homemade Pita Chips?
Baked pita chips are best eaten fresh, but they can be stored in an airtight container such as a Ziploc bag for up to a week. Just break open in case of hunger! 😁
If you want to keep them longer, you can freeze them for up to 2 months in an air tight container. To reheat frozen pita chips, place them on a baking sheet and bake at 350°F for about 5 minutes, or until heated through.

What to serve with Homemade Pita Chips?
Pita chips are thick, sturdy and crispy, making them perfect for pairing with sides. The chips don't break easily and their flavor pairs well with a variety of dips, sauces, and spreads. Dipping a pita chip is the perfect snack for when you don't have much prep time too.
Here are some of our favorite ways to dip a pita chip and a few tips (but trust me it's hard to go wrong):
1. With Greek Yogurt Dip
This healthy and flavorful dip is a perfect companion to the already healthy baked pita chips. Simply combine Greek yogurt, diced cucumber, garlic, salt, and pepper to taste.
2. With Hummus
Hummus is a versatile dip that can be made in endless flavor combinations. Our personal favorite is this roasted red pepper hummus recipe.
3. With Spicy Chicken Wings Sauce
The gentler flavors of the pita triangle are nicely complimented by this hot and spicy chicken wings sauce. When you're having a barbeque or a get-together, pita chips make a perfect side to your favorite wings recipe too.
4. With Tzatziki Sauce
5. With Guacamole
Guacamole is a classic dip that goes great with just about anything. Unlike thin, breakable store bought chips, the sturdy triangular homemade pita chip works perfectly as a scoop for guacamole.
6. With Pesto
Basil Pesto is a flavorful and versatile sauce that can be used in endless ways.
7. With Cheese Dip!
8. With Salsa🔥
9. With Honey-Mustard Dip
10. With BBQ Sauce
There are almost endless ways to prepare and serve a pita chip but it's always a quick and easy snack no matter your snack method is.

Other Recipes You'll Enjoy
How to Make Homemade Pita Chips
- Total Time: 17 minutes
Ingredients
- 6 pitas
- 3–4 tbsps extra virgin olive oil
- kosher salt or sea salt

Instructions
Oven Instructions
- Preheat oven to 375°F.
- Begin by opening the pita pocket and separate the two sides. This will create thinner chips or you can leave the two sides together for thicker chips. It's up to you!
- Cut each pita into 8 triangles using a sharp knife or kitchen scissors.
- In a small bowl, mix together olive oil and sea salt.
- Place pita triangles on a prepared baking sheet, lined with parchment paper, and brush with olive oil mixture using a pastry brush.
- Bake for 10-12 minutes or until chips are lightly browned.
- Cool completely before serving.
Air Fryer Instructions
To make pita chips in an air fryer, start by cutting pita bread into small wedges. Then, brush the wedges with olive oil and sprinkle with salt. Place the wedges in the air fryer basket in a single layer and cook at 400 degrees for 3-5 minutes, or until golden brown.
- Prep Time: 5 minutes
- Cook Time: 12 minutes
- Category: Snacks
- Method: Bake, Air Fryer