
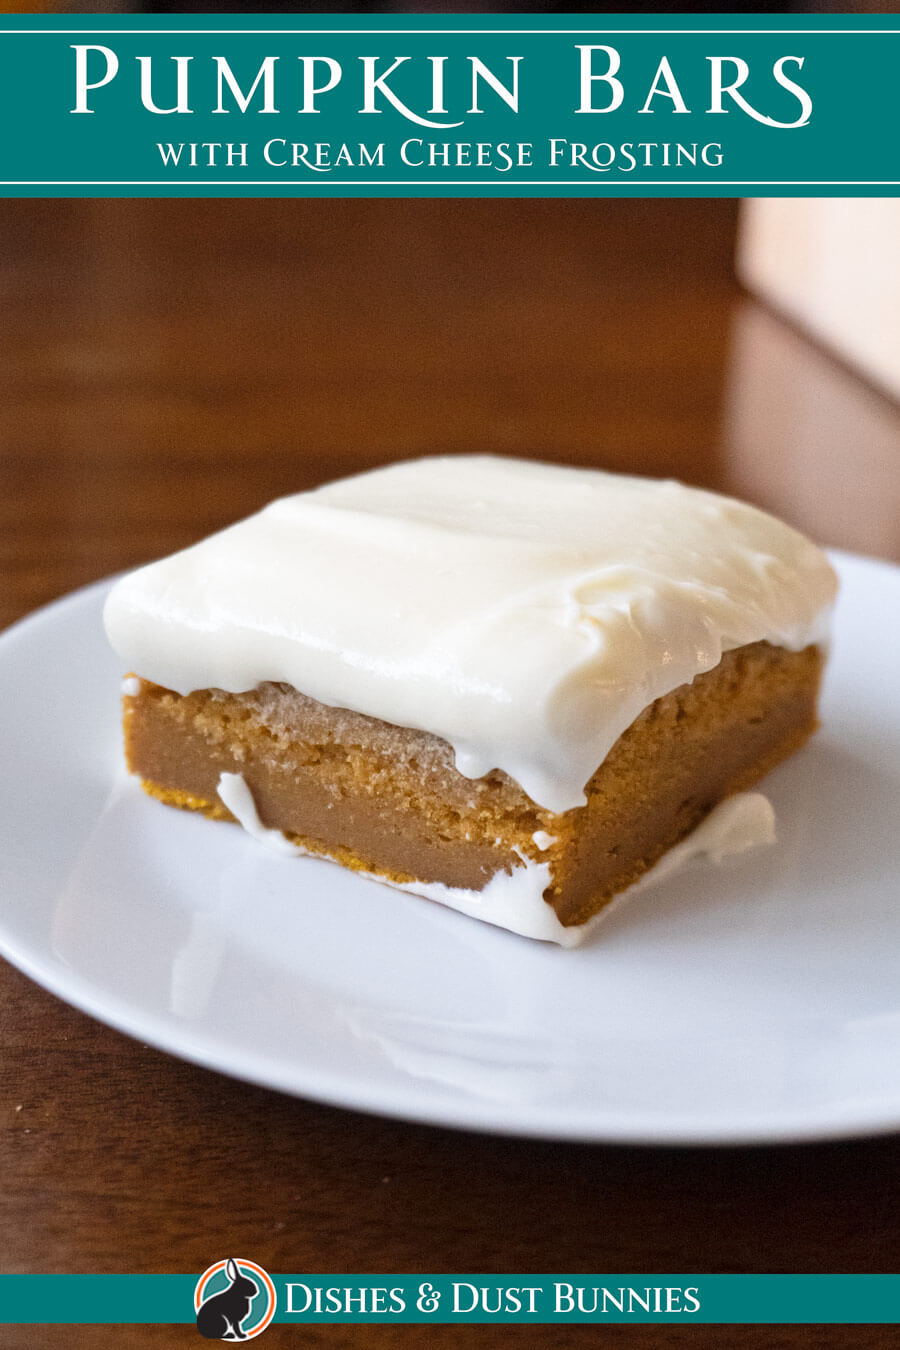
Pumpkin Bars with Cream Cheese Frosting
Pumpkin bars with cream cheese frosting are perfectly soft, moist, spiced just right and are absolutely irresistible! This classic and easy pumpkin bar recipe is perfect for celebrating fall and makes the perfect Thanksgiving dessert and Halloween dessert. Oh, and don't get me started on the super creamy frosting… It’s so good!
I hope you enjoy this recipe! ❤️ If you give it a try, please let me know how it turned out for you in the comments section at the bottom of the page or share a pic of your om noms on Instagram and tag @dishesanddustbunnies! ❤️
Be sure to see the recipe card at the bottom of the post for full ingredients & instructions!
How to make Pumpkin Bars with Cream Cheese Frosting – Overview
Making absolutely delicious pumpkin bars from scratch is easy peasy! At the bottom of this post, you'll find the pumpkin bar recipe with complete instructions and ingredient amounts, but before we get started, here's a little overview of how to make them. 😋
You'll begin by combining the wet ingredients – cream together the butter with the granulated sugar, then beat in the eggs and mix in the pure pumpkin puree.
Next, in a separate bowl, using a whisk, combine the dry ingredients – pumpkin spice, all-purpose flour, baking powder, baking soda and salt.
Combine the wet ingredients and dry ingredients, then scrape the batter into a greased (and parchment-lined) 9″x13″ metal baking pan. Pour the pumpkin mixture in. Bake at 350°F for 25 minutes or until a toothpick inserted into the center comes out clean.
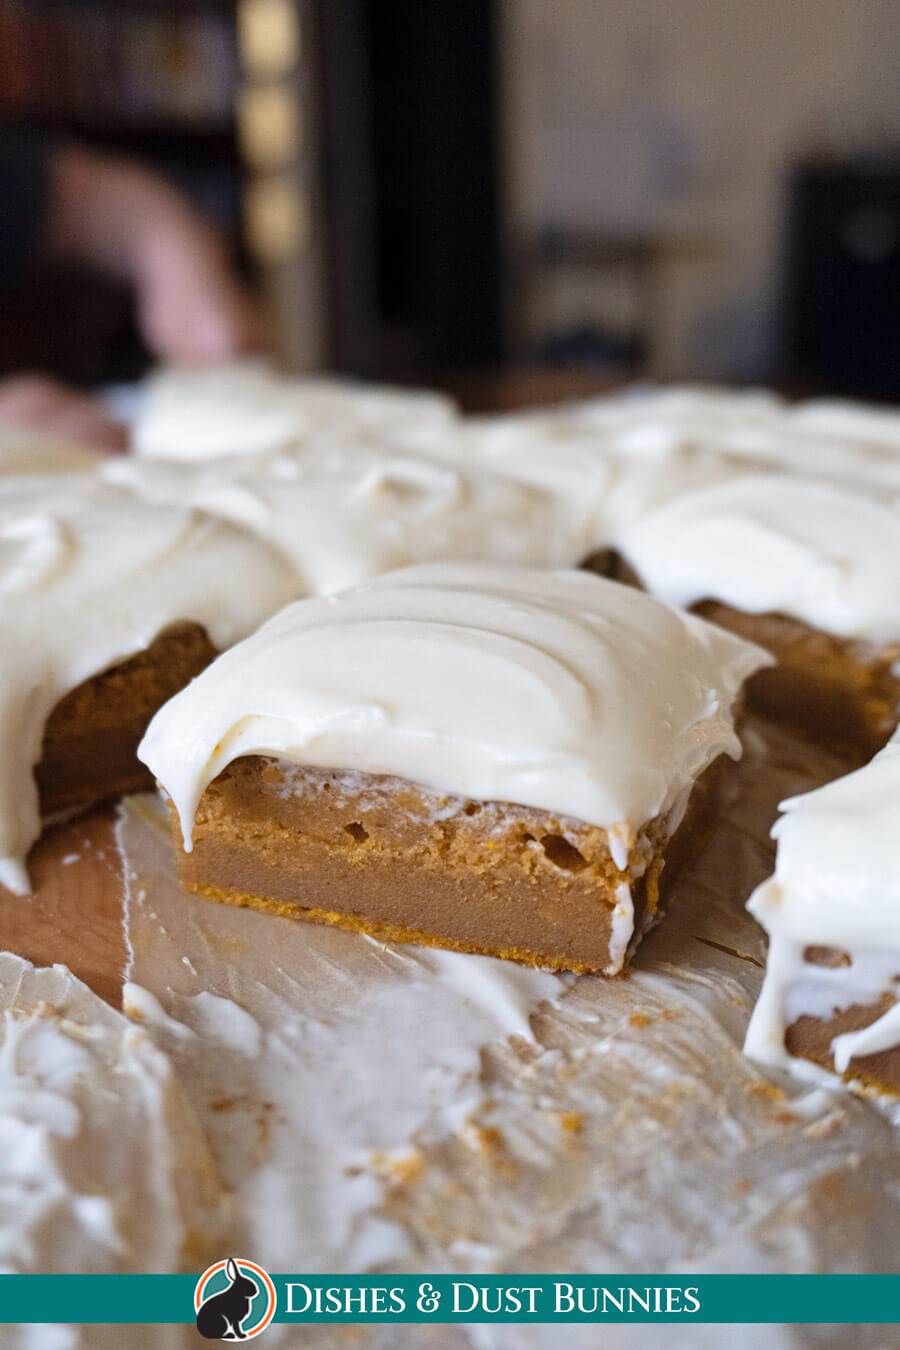
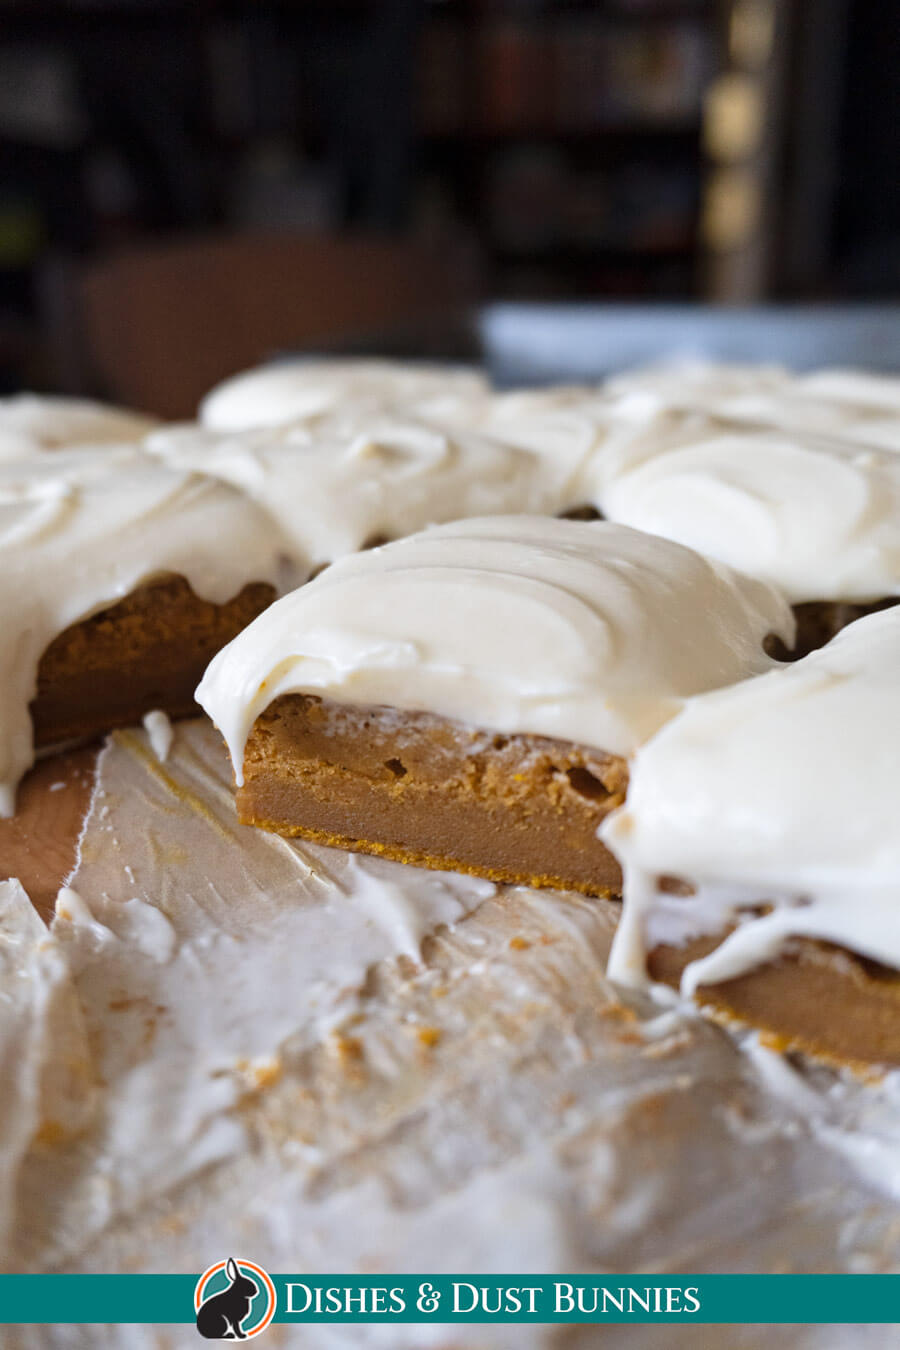
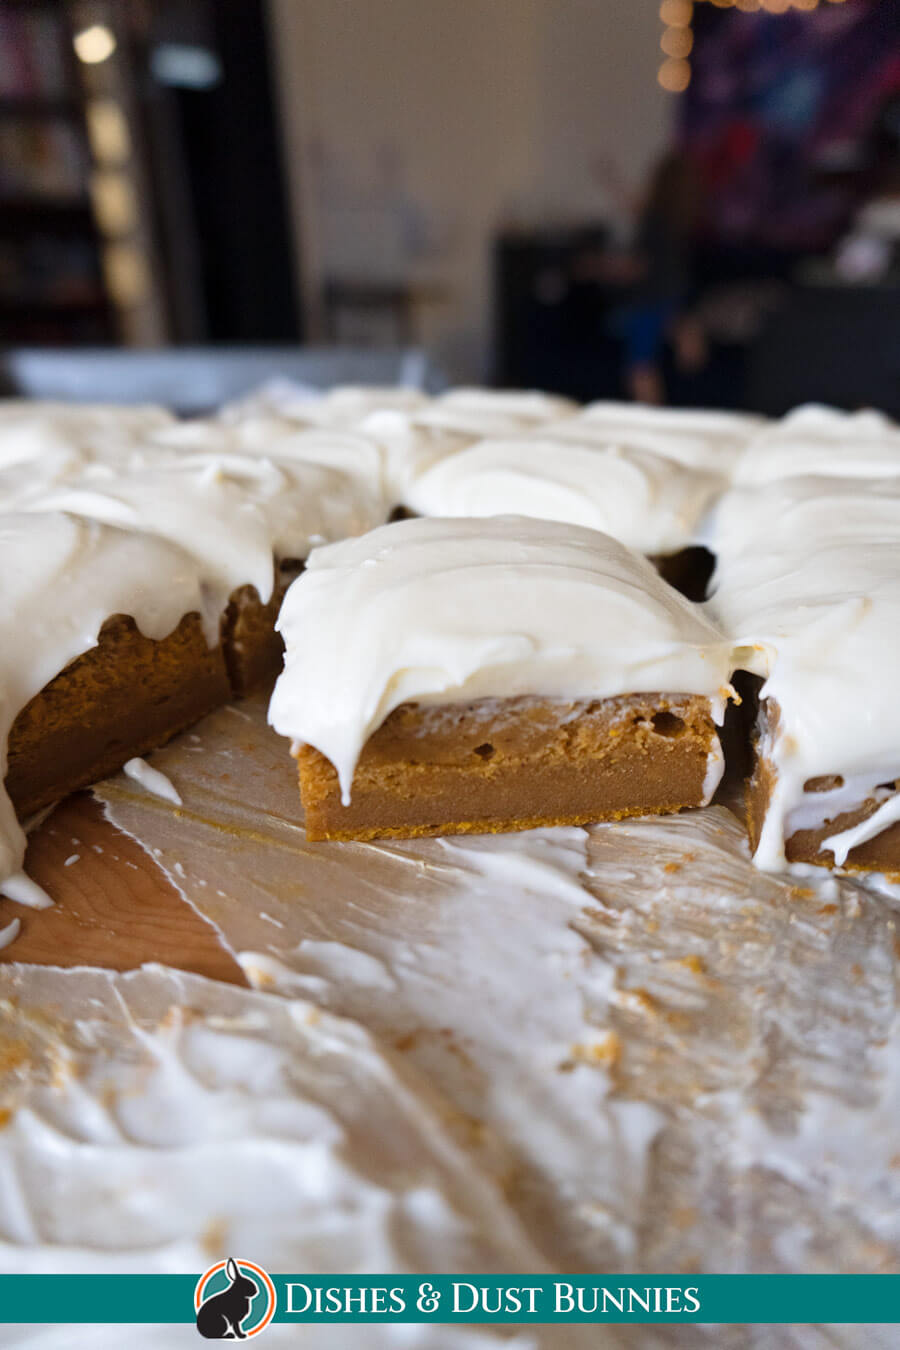
While your pumpkin bars are cooling, mix up a delicious cream cheese frosting in your electric mixer using these cream cheese frosting ingredients: softened butter, powdered sugar, softened cream cheese (not the light kind!) and a little vanilla extract. Beat cream cheese along with the other ingredients until smooth and everything is incorporated.
Allow the pumpkin bars to cool completely, then spread frosting evenly over top.
Chill in the fridge for a few hours, then using a sharp knife, cut the pumpkin bars into 18 pieces and serve!

What's the difference between Classic Pumpkin Bars and Pumpkin Cake?
Although pumpkin bars and pumpkin cake are very similar in their ingredients, such as pumpkin spice, pureed pumpkin and cream cheese frosting, one difference is that pumpkin bars have a more dense body.
Pumpkin cake is typically fluffy and has more of that typical “bready” texture most cakes tend to have. Pumpkin bars have a richer, more dense texture similar to pumpkin pie but leaning more towards the cakey side… so somewhere in a super yummy in between!
Homemade pumpkin puree vs store bought:
Which is best for my pumpkin bars?
You can use either homemade pumpkin puree or store-bought canned pumpkin (like Libby's) for this recipe. Both will work; however, I'd highly recommend using store-bought canned pumpkin as the pumpkin flavor will be richer and more pronounced.
If you do choose to use homemade pumpkin puree for this recipe, you'll need to make sure it's been drained of most of its liquid, concentrated and thick enough to pack enough flavor to make the pumpkin bars their yummiest.
I find that sometimes when using homemade puree, the pumpkin flavor we're looking for just isn't as intense as the canned pumpkin version… and that's ok! The store-bought kind is super concentrated and contains less water, so that's why it works so well!
Can I use prepared canned Pumpkin pie filling instead of pure pumpkin puree in this recipe?
No, you cannot. The two are not interchangeable. Pure pumpkin puree is simply cooked and pureed pumpkin, with nothing else added.
Pumpkin pie filling contains sweeteners, spices, and other ingredients that would throw off the flavor and texture of this recipe. If you want to use canned pumpkin, make sure it is labeled “100% pure pumpkin” and nothing else.
Can I use a jelly roll pan instead of a 9″x13″ baking pan to make this recipe?
The answer is yes! Jelly roll pans are actually the perfect size for this recipe. The bars will be a little thinner than if you use a 9″x13″ pan, but they'll still taste delicious.
If you don't have a jelly roll pan, you can also use a 9″x9″ baking pan. The bars will just be a little thicker.
Be sure to see the recipe card at the bottom of the post for full ingredients & instructions!
A few possible recipe variations:
Powdered sugar/Confectioners sugar: If you want to make this dessert a tad lighter you can remove the cream cheese frosting and use powdered sugar as a substitute.
Sprinkles: Depending on the occasion, Halloween, Thanksgiving, etc., you could top your pumpkin bars with cream cheese frosting with some appropriately themed sprinkles! For Halloween, you could try orange, black sprinkles or even cute little bat shapes!
Spices: You would already be using a pumpkin pie spice, but in order to intensify the Fall flavors in your pumpkin bars, you can add additional nutmeg, ground cinnamon, ground ginger or ground cloves which will give a warmer flavor.
Different Frosting: For this recipe, I decided to use the traditional and classic plain cream cheese frosting to top these pumpkin bars, and it works very well! If, however, you'd like to experiment with a different frosting flavor, definitely give it a try!
I'm working on a few different frosting recipes that I know will complement the flavor of these pumpkin bars very well – maple cream cheese frosting, for example! Once I've perfected it, I'll link to it here! 😋
Nuts: You could try adding some nuts to the batter to give the pumpkin bars some crunchy texture. Chopped walnuts, pecans and pralines would work very well! You could also try sprinkling chopped nuts on top of the cream cheese frosting for garnish and for yumminess!
Frosting toppers: Not just chopped nuts! You can bless your pumpkin bars with cream cheese frosting by mixing all sorts of fun things with the frosting. Crushed candy canes make a great holiday-themed topping, or even some dried fruit in the frosting will compliment the pumpkin flavors. The possibilities are vast, so have fun and get creative!
Chocolate chips: Sometimes, I like to throw a handful of mini chocolate chips into the batter! Though you can choose to alternatively add chocolate chips right into the frosting itself. Sooooo yummy!
Instead of all purpose flour: You can substitute all purpose flour in this recipe for almond flour! You can use almond flour using the exact same ratios as the all purpose flour!
🤔 Looking for alternatives or substitutes to cream cheese?
👉 Explore this helpful guide on tasty substitutes!

Be sure to see the recipe card at the bottom of the post for full ingredients & instructions!
Do pumpkin bars need to be refrigerated?
Pumpkin bars do not need to be refrigerated and can be stored at room temperature in an airtight container for up to 3 days. Having said that, in my opinion, pumpkins bars taste better cold so I would always keep them refrigerated in order to be able to serve them cold.
It's a matter of personal preference, some may prefer pumpkin bars at room temperature but for me, these bars are best when served chilled. The chilled pumpkin bars hold their shape better. After serving them I would store them in the fridge rather than out on the countertop, but it's up to you!
Can you freeze pumpkin bars with the cream cheese frosting on them?
We've never had to freeze them because they get eaten up so quick we never have leftover bars!
You can freeze the bars if you'd like, but, I would not recommend freezing them with the frosting on. They would taste best if you freeze just the bar part without the frosting. Freezing the bars with the frosting on will negatively affect the texture when everything thaws out.
It's best to freeze the bars without the frosting on, then, when you're ready to serve your pumpkin bars, frost them.
You can also freeze the frosting separately in an airtight container and thaw overnight before using.
How long do pumpkin bars stay good for?
When refrigerated in an airtight container, pumpkin bars will keep for up to 5 days.
If you want to keep them longer, they can be frozen for up to 2 months. Just be sure to wrap them tightly in freezer-safe wrap or store them in a freezer-safe container. Also, I would not recommend freezing them with the frosting on.
Again, pumpkin bars can be stored at room temperature in an airtight container for up to 3 days.
Can I make Pumpkin bars ahead of time?
You can prepare pumpkin bars ahead of time and put them in the fridge or freezer.
If freezing: It's best to freeze the bars without the frosting on, then, when you're ready to serve your pumpkin bars, frost them. This is to prevent the any issues with the texture they thaw out.
What to Serve with Pumpkin Bars with cream cheese frosting?
Pumpkin bars with cream cheese frosting are the perfect fall dessert! They're easy to make and they work well with a variety of toppings. Here are some ideas for what to serve with a pumpkin bar:
- Whipped cream
- Chopped nuts
- Caramel sauce
- Chocolate sauce
- Cinnamon sugar
- Vanilla Ice cream
- Hot coffee or tea
More Pumpkin & Fall recipes you'll enjoy:

Pumpkin Bars with Cream Cheese Frosting
- Total Time: 35 minutes
- Yield: 18 bars 1x
Ingredients
- ½ cup unsalted butter, softened
- ½ cup white sugar
- ½ cup brown sugar, packed
- 2 large eggs
- 14 oz. canned (1+3/4 cups) pure pumpkin purée like Libby's or E.D. Smith brands.
(you can also use your own pumpkin purée for this recipe, but I highly recommend using canned – see my notes) - 2 tsps pumpkin pie spice
- 1 ½ cups all purpose flour
- 1 tsp baking powder
- ½ tsp baking soda
- ½ tsp salt
Frosting ingredients:
- ¼ cup unsalted butter, softened
- 12 oz. (1 1/2 cups / 1 1/2 blocks) of plain cream cheese, softened (don’t use the light kind for this recipe)
- 1 tsp vanilla extract
- 2 cups powdered sugar

Instructions
- Preheat the oven to 350°F.
- Cream the butter and sugar together.
- Beat in the brown sugar and then eggs one at a time.
- Slowly combine the pumpkin.
- In a separate bowl, whisk together all the dry ingredients so that they are well combined.
- Combine the wet and dry ingredients.
- Scrape the batter into a greased and parchment paper lined 9 x 13” metal baking pan.
- Bake in the oven for about 25 minutes or until a toothpick comes out clean when inserted into the centre.
- Once the pumpkin bars have finished baking, allow them to cool on a metal cooling rack until they reach room temperature (while still in the pan!).
- Once cooled, spread the cream cheese frosting evenly over the surface of the bars. Chill in the fridge for at least four hours. Once chilled, cut into about 18 bars and serve.
Frosting instructions
- Using an electric mixer or stand mixer, beat the cream cheese, butter and vanilla until smooth.
- To this, beat in about ¼ cup of the icing sugar at a time and mix until smooth.
- Spread evenly over the pumpkin bars.
Notes
For this recipe, you can use either homemade pumpkin puree or the canned store bought kind (like Libby's). Both will work however I'd highly recommend using store bought as the pumpkin flavour will be more rich and pronounced. I find that sometimes when using homemade puree, the pumpkin flavour we're looking for just isn't as intense as the canned version… and that's ok! The store bought kind has is super concentrated, thicker and contains less water, so that's why it works so well!
- Prep Time: 10 minutes
- Cook Time: 25 minutes
- Category: Dessert
- Method: Baking
why is there no flour? how does it turn out?
Oop! Thanks for pointing that out! Looks like I left the flour out by accident – I updated the recipe so it should be ok now!
Thanks so much and hope you enjoy the recipe! 🙂
Michelle
This looks absolutely delicious!
Thanks so much! 🙂
Those look amazing! I can’t wait to try these. I added them to yum for later 🙂
Thanks so much and please let me know how they turn out for you! 🙂
Michelle
These look to die for!!! I love pumpkin and cream cheese frosting, but I’ve never actually tried using pumpkin puree straight from the pumpkin. Will have to try that…
Thanks so much Lindsey! Try it and you’ll love it! 😀
Michelle