
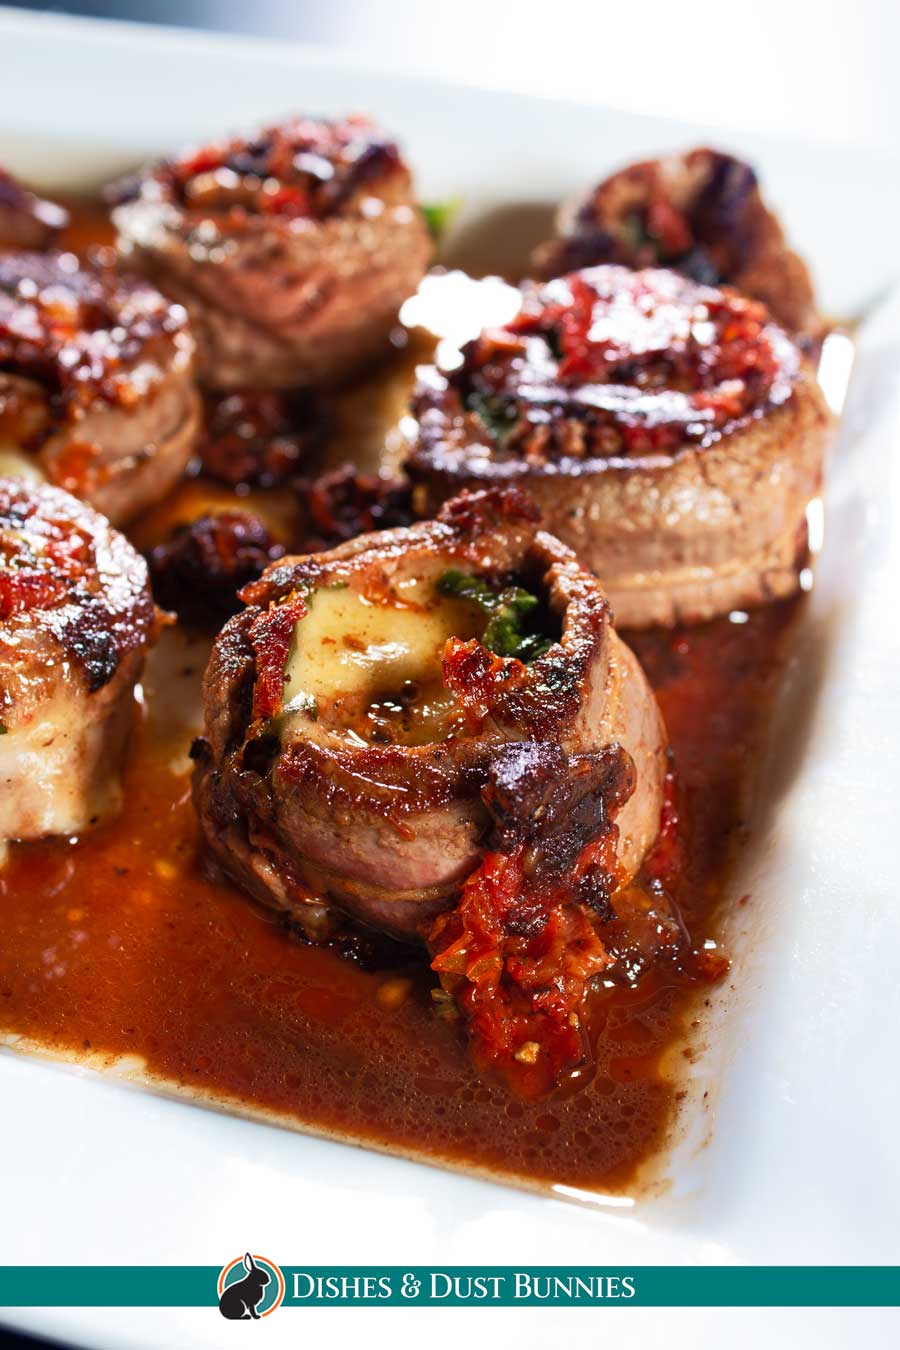
Italian Steak Pinwheels (Roll Ups)
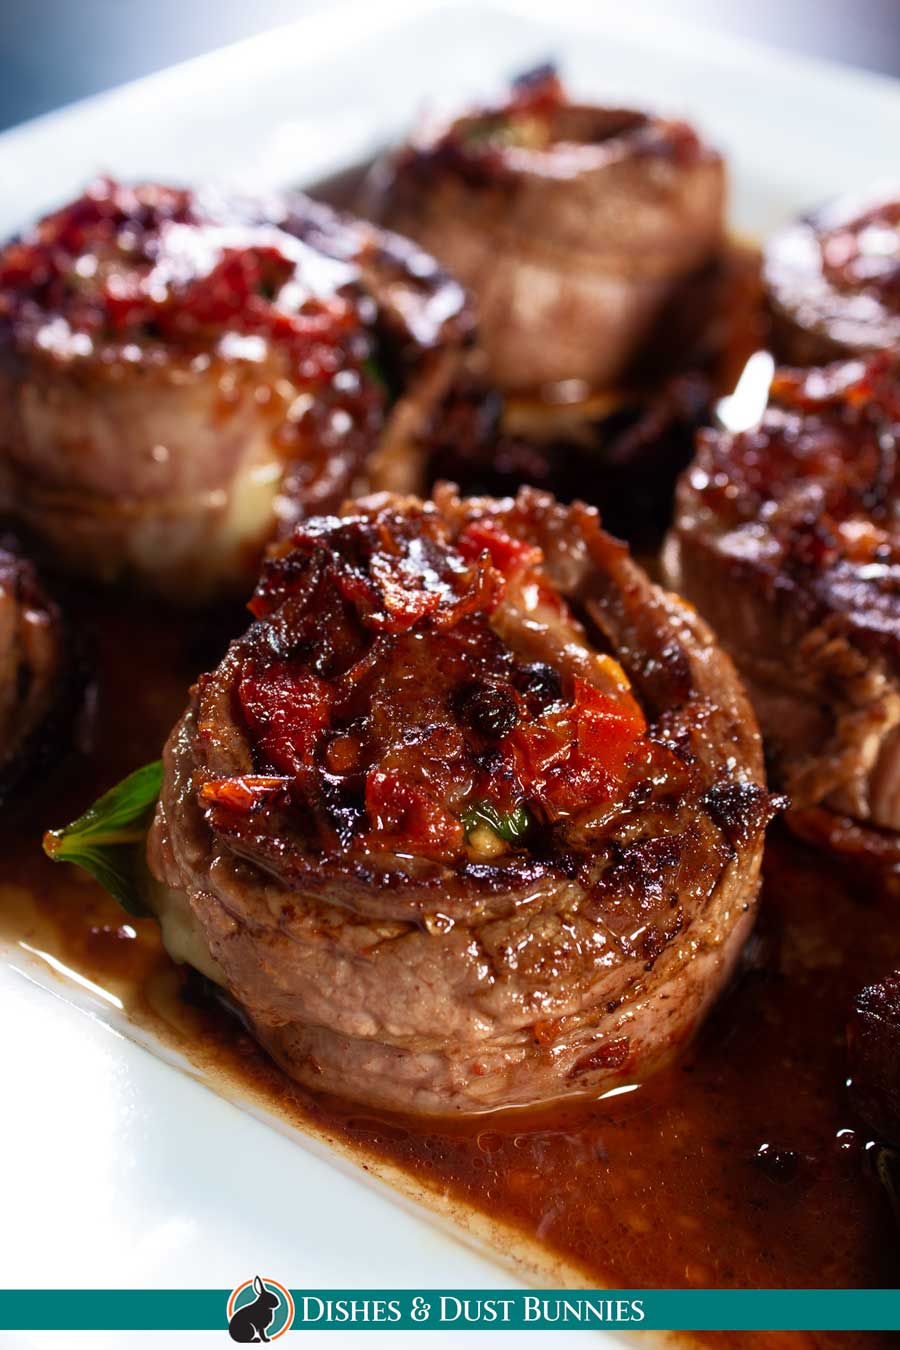
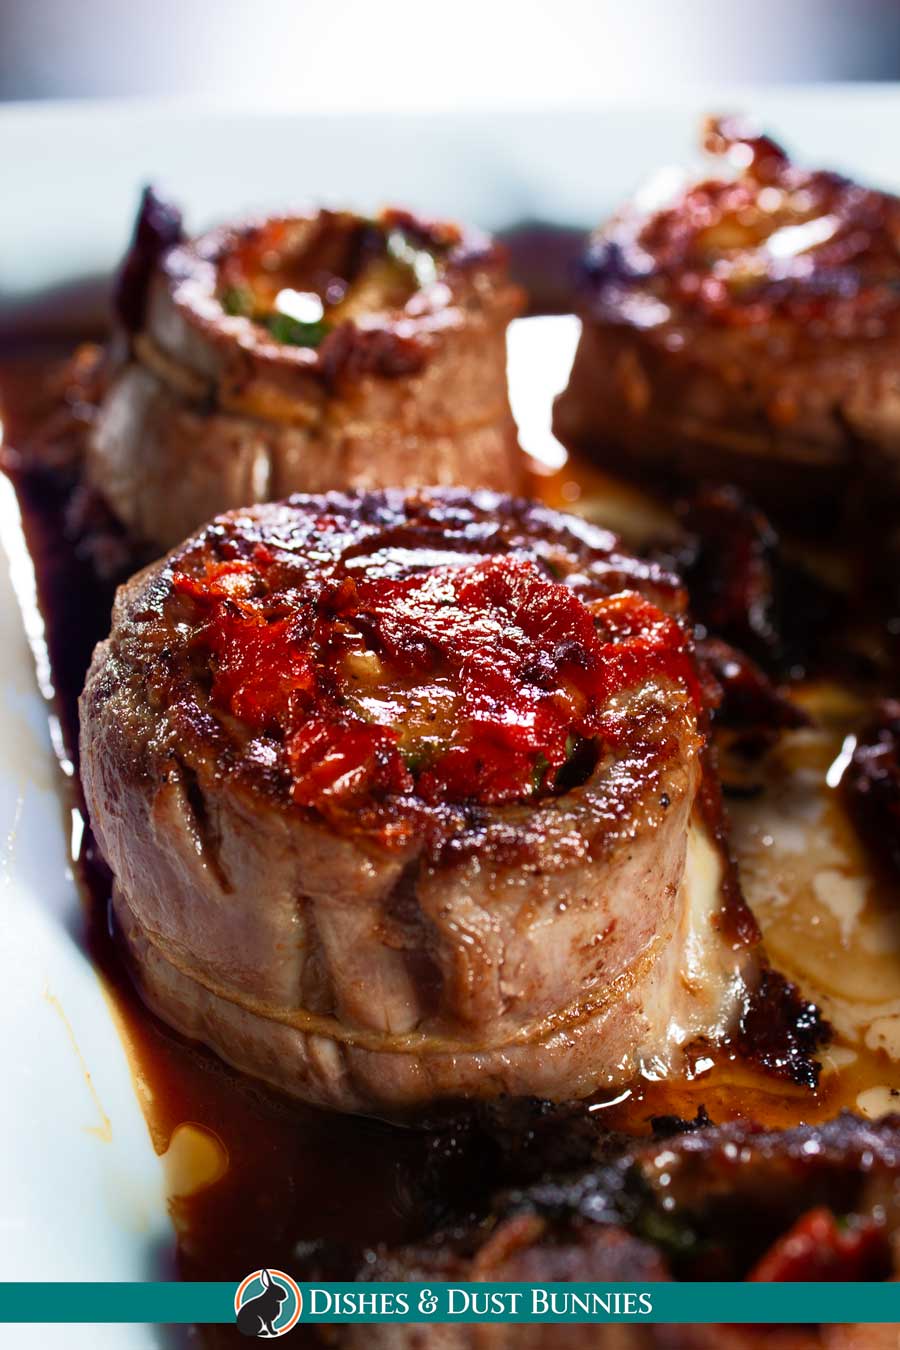
These Italian steak pinwheels are easy to make with only a few ingredients and taste amazing! They're great for any occasion and will quickly become one of your favorite beef recipes. With tender flank steak, fresh basil, sun dried tomatoes and mozzarella cheese you'll have an amazing dinner that tastes like it came from the finest restaurant in town! Perfect for a dinner party at home when friends come over!

I hope you enjoy this recipe! ❤️ If you give it a try, please let me know how it turned out for you in the comments section at the bottom of the page or share a pic of your om noms on Instagram and tag @dishesanddustbunnies! ❤️
What is a stuffed flank steak roll up/pinwheel steak?
A stuffed flank steak roll up, also known as a pinwheel steak, is a type of steak dish that is made by rolling a slice of butterflied flank steak around a stuffing made from cheese, herbs and other ingredients. The flank steak is then secured with kitchen twine, then pan fried or baked in the oven.
What are pinwheel steaks made of?
Pinwheel steaks can be stuffed with a variety of different ingredients, usually cheese and herbs. In this recipe, I've used fresh basil, sun-dried tomatoes, mozzarella and a bit of salt and black pepper.
How do you butterfly flank steak for pinwheels?
Butterflying a steak is a technique for cutting the meat so that it is thinner and more even in thickness. This makes it more likely to cook evenly and results in a more tender finished product. To butterfly flank steak for pinwheels, start by cutting the steak in half horizontally, then open it up like a book. Finally, roll the steak up into a pinwheel shape (along with the other ingredients) and secure with kitchen twine.
When butterflying your flank steak, be sure to use a sharp knife! Using a dull knife will make it more difficult to cut thinly.
Be sure to see the recipe card at the bottom of the post for full ingredients & instructions!
How to Make the Best Flank Steak Pinwheels Recipe – Overview
Although steak pinwheels look quite impressive and complicated, they're actually very simple to make! At the bottom of this post, you'll find the full recipe including the ingredients used along with detailed instructions.
To start, you'll need to butterfly your flank steak. Essentially you want to cut your steak, so that it's thin enough to roll up with ingredients on the inside. This is actually quite simple to do – see the details in the recipe at the bottom of the page.
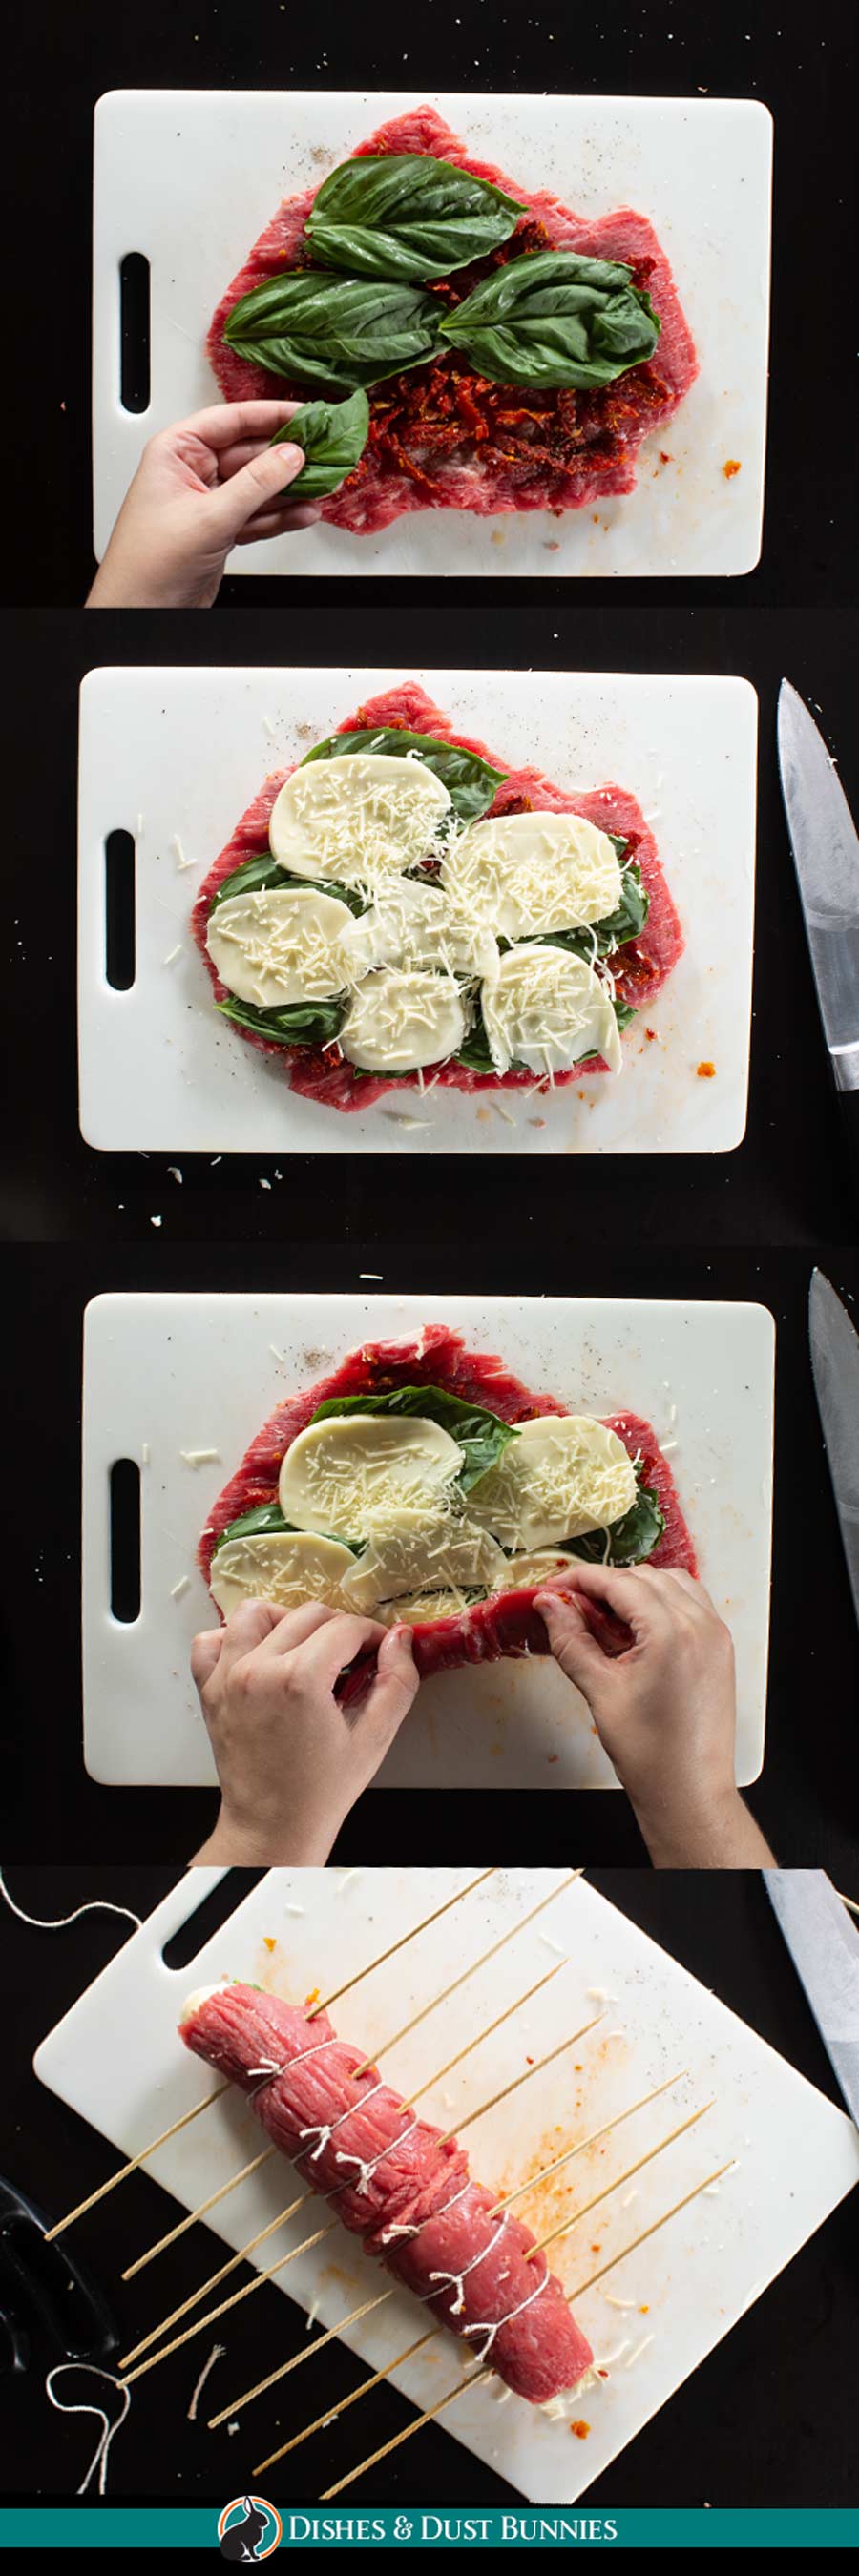
Next, take your butterflied flank steak and lay out the filling ingredients on top. For this recipe I used fresh basil leaves, sun-dried tomatoes, then slices of mozzarella. Once the fillings have been laid out, the steak is rolled up into the shape of a log and secured with kitchen twine. Segments of the rolled steak log are then cut in between each section of tied twine.
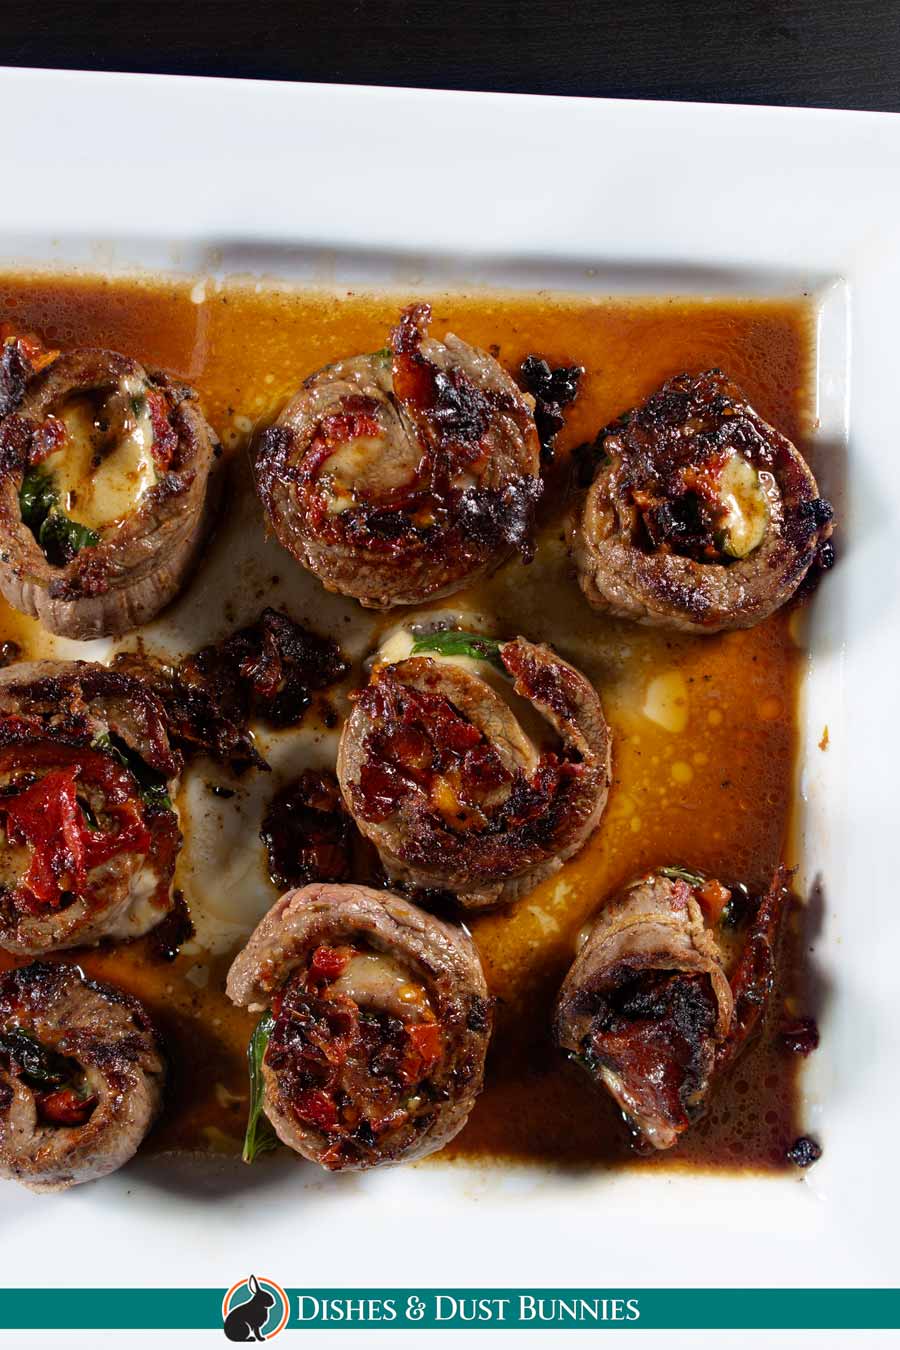
Finally, the steak pinwheels are either cooked in a frying pan or skillet or baked in the oven.
How do you cook steak pinwheels in the oven?
To cook the steak pinwheels in the oven, first make sure your oven is preheated at 350°F. In a glass baking dish, drizzle a little olive oil or canola oil on the bottom, then place the steak rolls, pinwheel side down on the bottom. On top drizzle a little more oil, then sprinkle with some salt and pepper. Bake for about 25 minutes, then serve.
How to cook steak pinwheels in a skillet or pan?
This is my typical method for cooking steak pinwheels as I find it adds a great flavour from the browned bits which have been seared in the pan. The oven method is tasty too though, so use whatever works best for you!
Begin by adding a little oil to a large skillet or frying pan. To the pan, add the steak roll ups, sprinkle with a little salt and pepper, and cook for about 7 minutes per side or until slightly browned and the cheese inside gets a bit melty. Make sure when cooking, that the spiral sides are what touches the surface of the pan. Once cooked, remove each from the pan and set aside on a serving plate.
You can serve them right away or alternatively, you could also place pinwheels in a baking dish with a lid and put it in the oven at 350°F for about 10 minutes to keep the cheese melty before serving. This is usually what I do and it's super yummy!
How to Serve Steak Roll Ups/Pinwheels
If having for dinner, serve along with rice or potatoes and some veggies on the side. I find that the steak roll ups are best with some kind of side that will soak up the juices and flavours from the sun dried tomatoes and other ingredients used. This way is my favourite! Please don't miss out on those delicious juices at the bottom of the skillet or baking dish! Drizzle the juices over top of the served steak rollups and the rice/potatoes – it's soooo good this way!
If serving as an appetizer or at a party, you can place the steak roll ups on a tray and guests can take them as they please.
Recipe Variations
There are so many different ways to stuff your steak pinwheels and make them absolutely delicious! Below are a few ideas on how you can change up this recipe to make it your own. As I make more variations of this recipe, I'll add the ideas here!
Different Cheeses – you can use practically any kind of cheese you like when making flank steak pinwheels, but I find the best options are sliced mozzarella, provolone cheese, and Parmesan cheese.
Different Herbs – You could use any number of herbs in this flank steak recipe, such as fresh rosemary, fresh parsley, thyme, or oregano. Some other great options include mint, and cilantro. No matter which herbs you choose, the end result will be a delicious and flavorful dish. Enjoy!
Different Fillings – Some other possible fillings for flank steak pinwheels include:
- Roasted red peppers
- Pesto sauce
- Spinach
- Tomato sauce
- Sliced ham, salami, prosciutto or pepperoni
- Bacon strips
- Artichoke hearts
Can you prepare steak pinwheels ahead of time?
These steak pinwheels are also perfect for a party or as an appetizer. You can prepare them ahead of time according to the recipe, and then cook them just before serving. They're sure to be a hit with your guests!
Can you freeze flank steak pinwheels?
Yes, you can freeze flank steak pinwheels. Just make sure to wrap them tightly in plastic wrap or aluminum foil before freezing in an airtight container. They will keep in the freezer for up to 2-3 months.
To cook frozen steak pinwheels, place them in a baking dish and bake at 350°F for 20-25 minutes. You can also thaw them in the fridge overnight before cooking.
What to serve with Italian Steak Pinwheels
Steak pinwheels are great served with any potatoes; mashed, baked or fried. They're also great with rice and a side of steamed veggies. Here are a few more yummy recipe ideas to pair with your steak roll ups:
Italian Steak Pinwheels (Roll Ups)
- Total Time: 40 minutes
- Yield: 6–8 steak roll ups (depends on the size of your steak) 1x
Ingredients
- 1 lb. skirt or flank steak, butterflied (cut so it's a large flat piece – see pics in the post)
- 6 or more slices of Mozzarella cheese, or enough to cover the steak (I used a sliced up mozzarella ball because I find it tastes best with the sun dried tomato, but you could also use mozzarella sliced from a cheese brick)
- 8+ basil leaves
- sun dried tomatoes in oil
- Salt and pepper to taste
- Grated Parmesan (Optional)
- Canola Oil
Other Items Needed
- Kitchen twine/string – to tie the steak

Instructions
Prepping the Steak Roll Ups
- Using a sharp knife, butterfly the steak. This means to cut the steak, horizontally through the center, then stopping before you get to the other side. Then, open up the steak like a book and lay it flat. Essentially they call this “butterflying” because you're opening up the meat like “wings”, but personally I think comparing it to opening a book makes more sense. lol For reference, please take a look at the pictures in the body of this post to see how I butterflied my steak. It's super easy to do, so don't worry! You should end up with a nice flat piece of steak that's easier to roll up.
- On top of the steak, lay out basil leaves, then sun dried tomatoes, then slices of mozzarella. If you're using grated parmesan, sprinkle some at this point.
- Next, roll up the steak so it's the shape of a log. Using the kitchen twine/string, tie the steak in segments. I separated the one in this post into 6 segments, but this might be different for you depending on the size of the steak you're using.
- Next, using a sharp knife, cut the steak log between the tied parts, so you have little steak rolls. Make sure to leave the twine on these pieces so they hold their shape.
How to Cook Steak Roll Ups
Frying Pan/Skillet Method
- Add a little oil to a large skillet or frying pan. To the pan, add the steak roll ups, sprinkle with a little salt and pepper, and cook for about 7 minutes per side or until slightly browned and the cheese inside gets a bit melty. Make sure when cooking, that the spiral sides are what touches the surface of the pan.
- Once cooked, remove each from the pan and set aside on a serving plate. Alternatively, you could also put them in a baking dish with a lid and put it in the oven at 350°F for about 10 minutes to keep the cheese melty before serving. I usually do this and it's super yummy!
Baking in the Oven
- Preheat the oven to 350°F.
- Drizzle a little oil in the bottom of a glass baking dish and arrange all the steak roll ups, spiral side down. Drizzle a little oil over top and sprinkle with some salt and pepper. Put the lid on the baking dish and bake for about 25 minutes.
- Once finished, remove the lid, allow to stand for a couple minutes, then serve.
How to Serve Steak Roll Ups
- If having for dinner, serve along with rice or potatoes and some veggies on the side. I find that the steak roll ups are best with some kind of side that will soak up the juices and flavours from the sun dried tomatoes and other ingredients used. This way is my favourite! Please don't miss out on those delicious juices at the bottom of the skillet or baking dish! Drizzle the juices over top of the served steak rollups and the rice/potatoes – it's soooo good this way!
- If serving as an appetizer or at a party, you can place the steak roll ups on a tray and guests can take them as they please.
Notes
In the pictures for this post, you'll notice that in addition to kitchen twine/string, I also secured my steak with wooden skewers – I found that this isn't necessary so long as your twine is secured tight enough. Using only twine should be enough to hold everything!
Depending on your guests or who you're serving the steak pinwheels to, you may want to remove the kitchen twine for them. My son loves this recipe, but needs me to remove the string for him first. If you serve them with the twine still intact, just remind your guests to remove it before eating. I find that they look quite nice with the twine still on when served, but it's up to you!
If making these as appetizers, you can make smaller sized steak roll ups and secure them with toothpicks to make them (a little bigger than) bite sized. If doing this, to save on time, I recommend baking them in the oven rather than in the skillet or pan.
- Prep Time: 15 minutes
- Cook Time: 25 minutes
- Category: Main
- Cuisine: Italian Inspired