Ingredients
Scale
- 2 cups warm water in a large measuring cup
- ⅓ cup sugar
- 1 ½ tbsp active dry yeast
- 1 ½ tsps salt
- ¼ cup canola or vegetable oil
- 5–6 cups bread flour, separated
Instructions
For the Yeast Mixture:
- You will need the water, yeast, and sugar for this step.
- Spoon the active dry yeast into a measuring cup and add about 1 tsp of the sugar (it’s ok if it’s a little more).
- Add about 1/4 cup of the warm water to the yeast and sugar. Stir it up and let it rise for about 10 minutes until it’s frothy.
- Combine the remaining water and the oil and set it aside until needed.
- While waiting for the yeast mixture to foam up prepare the dry ingredients.
For the dry ingredients:
- In the stand mixer add 4 cups of the flour along with the remaining sugar as well as the salt. Set the mixer to ‘Stir” using the hook attachment. In a couple minutes the dry ingredients should be well combined.
- Check on your yeast mixture. If it’s frothy and foamy it’s ready to use. Now to make things simple add the contents of the measuring cup with the water and oil to the measuring cup with the yeast.
- With your mixer speed set to 1 or stir, gradually pour in the contents of the wet ingredients. Turn up the speed to 2 and mix for about 5 min.
- Set your mixer back to speed 1 (or stir). Now begin adding the remaining flour 1/2 a cup at a time. Mix together for about 10 on speed 2. The dough should be coming together in the mixer bowl and should be no longer sticking to the sides when it’s done mixing. You can add a little more flour if it’s still too sticky.
- Now temporarily remove the dough from the bowl and form it into a ball. Using cooking spray coat the inside of the bowl and put the dough back in the bowl and use cooking spay on top as well. Next cover the top of the bowl with plastic wrap and put in a warm place to rise until doubled in size (should take about 30 min).
- Once the dough has doubled in size punch it down and remove it from the bowl. Let the dough rest for about 10 minutes. Once rested divide the dough into 2 equal portions in the form of a ball.
- Take one of your dough balls and roll it out on a floured surface using rolling pin. Roll out the ball roughly into the shape of a rectangle.
- Now roll the rectangle up to form sort of a log and turn the ends in. Place the log (seam down) into a bread pan coated with cooking spray. Then spray the top of the dough as well. Repeat the previous steps with the other portion of dough.
- Place the two prepared bread pans in a warm place to rise until the dough is about 1 inch or so above the pans (This should take about 35-45 min).
- Once risen place into the oven (pre-heated to 350°F) and bake for 30 min or until top is golden.
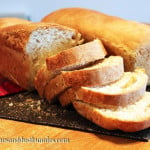
- When the bread is finished baking empty the pans onto a cooling rack.
Alternate Instructions for Hand-Kneading the Dough
If you prefer to knead the dough by hand instead of using a stand mixer, simply mix the ingredients in a large bowl and knead on a lightly floured surface for about 8–10 minutes, or until the dough becomes smooth and elastic. Follow the remaining steps as outlined in the recipe.
Notes
Tip: When I rise the bread dough I place my loaves into my oven which has been preheated to 200°F and then switched off. This gives the dough just the right amount of heat to allow them to rise without baking them before they’re ready. Make sure the oven has been switched off before letting your dough rise in there though!
- Prep Time: 15 minutes
- Cook Time: 30 minutes
- Category: Bread
- Method: Stand Mixer, Oven