
Nanaimo Bars – A Classic No-Bake Canadian Dessert
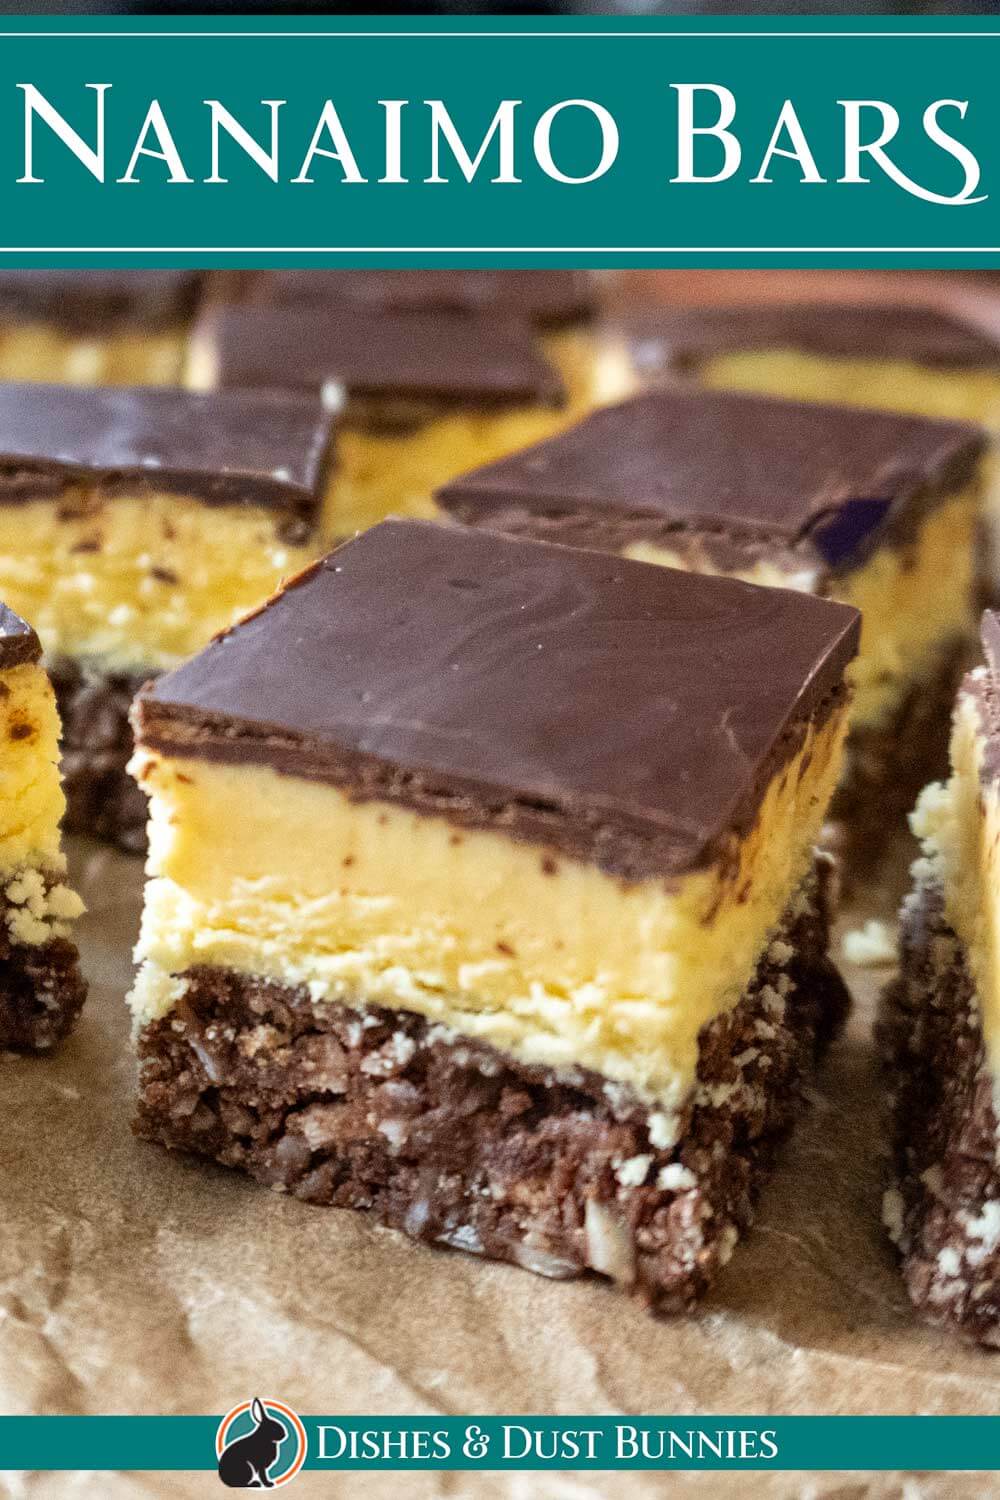
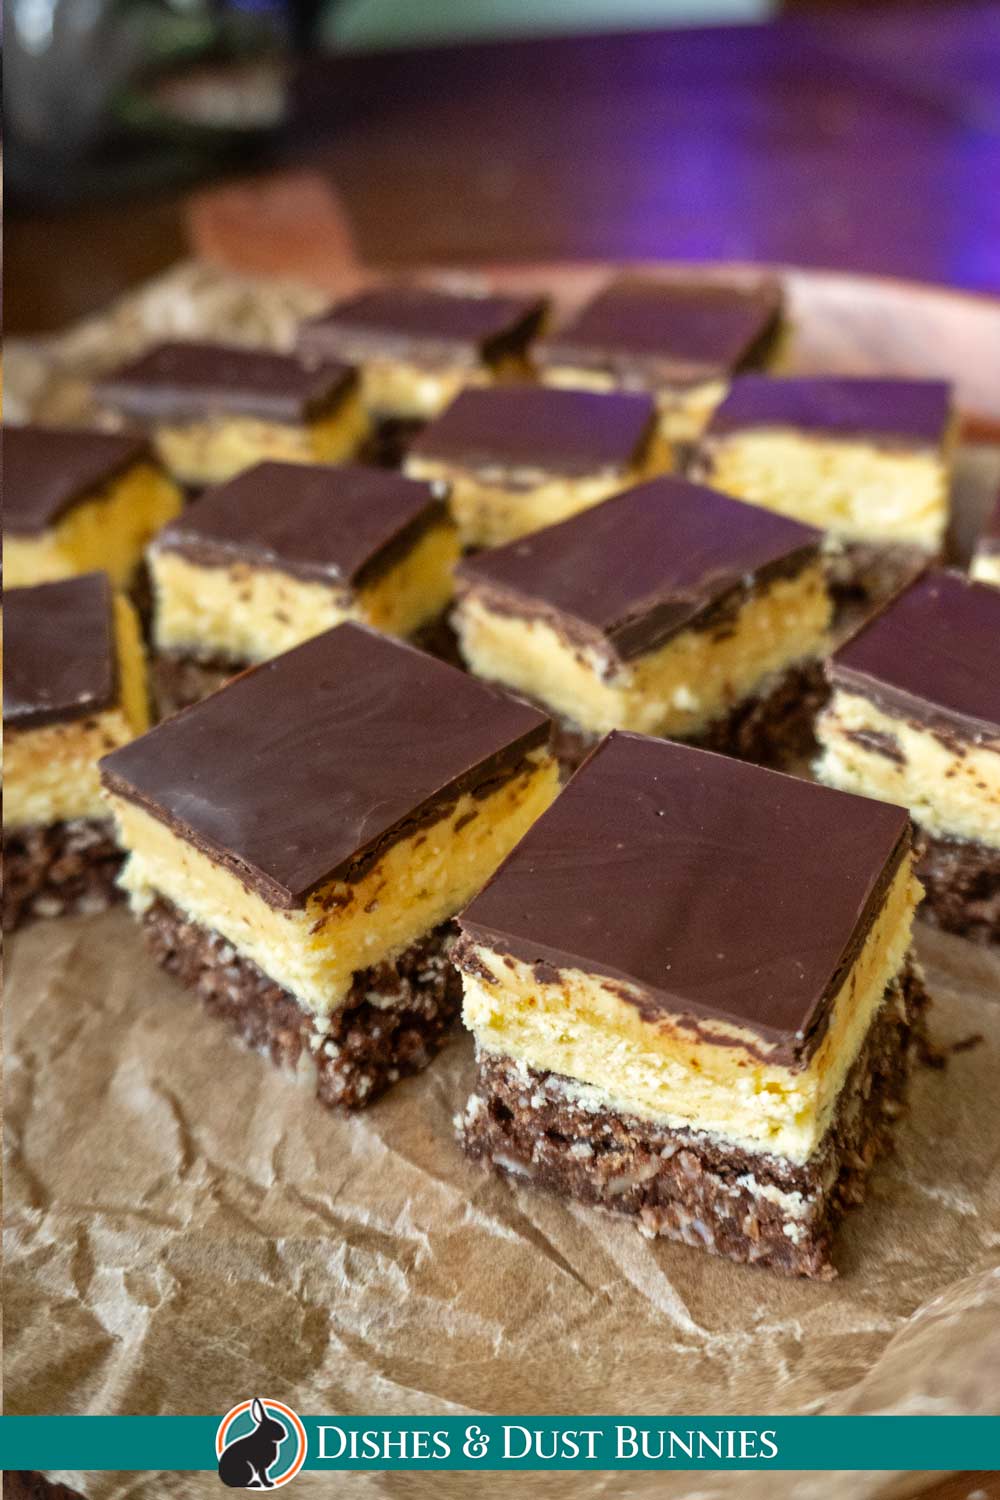
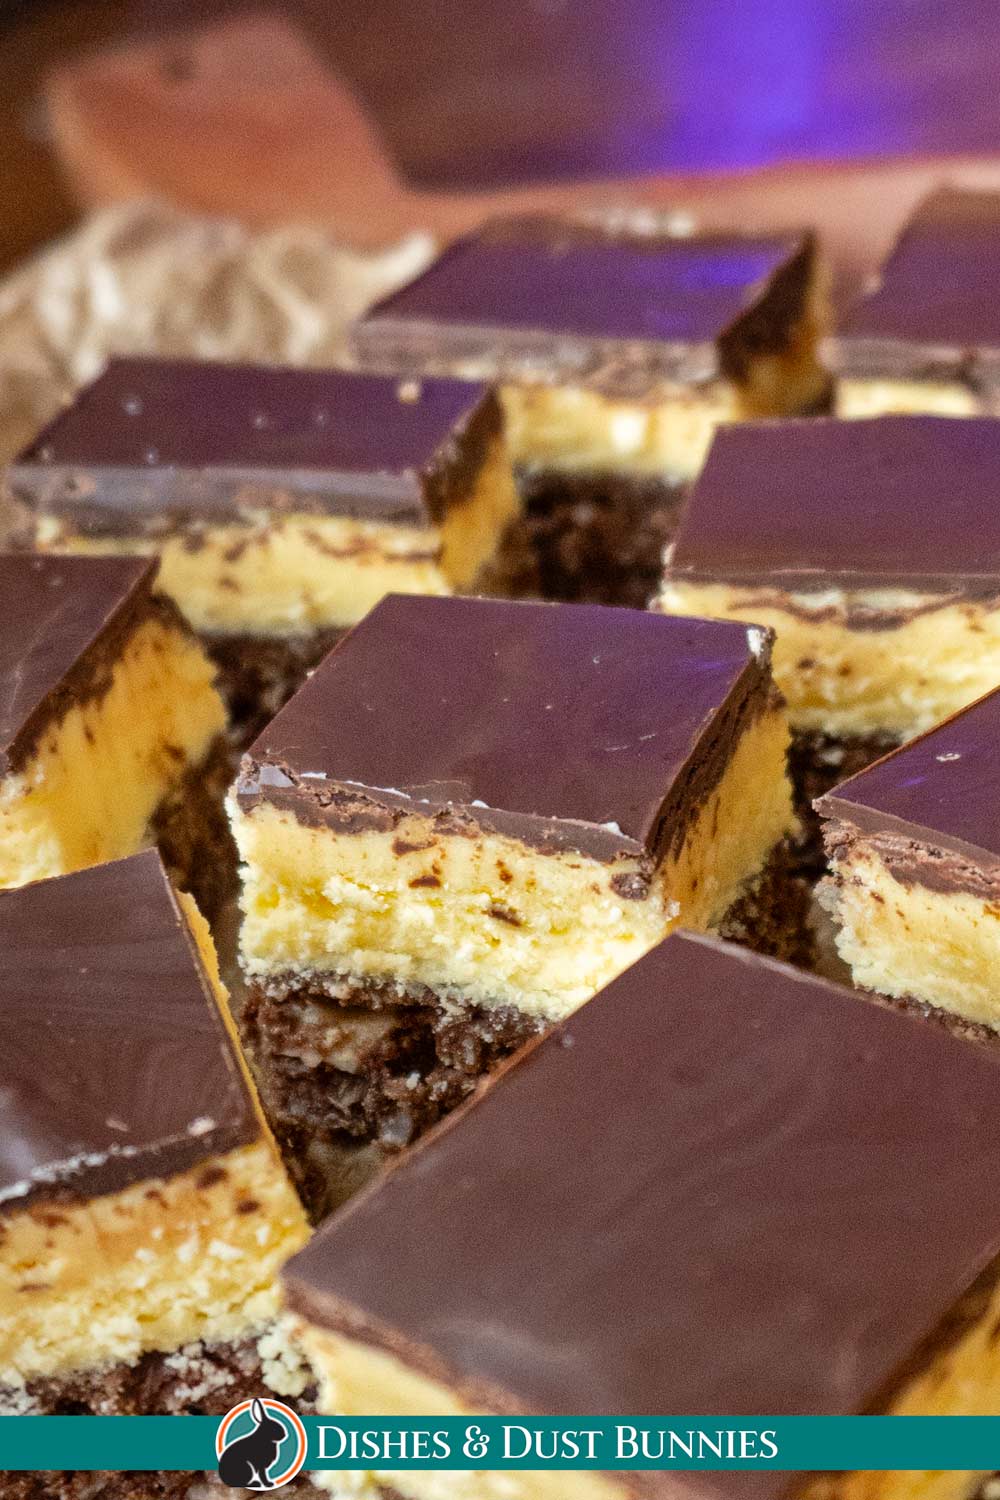
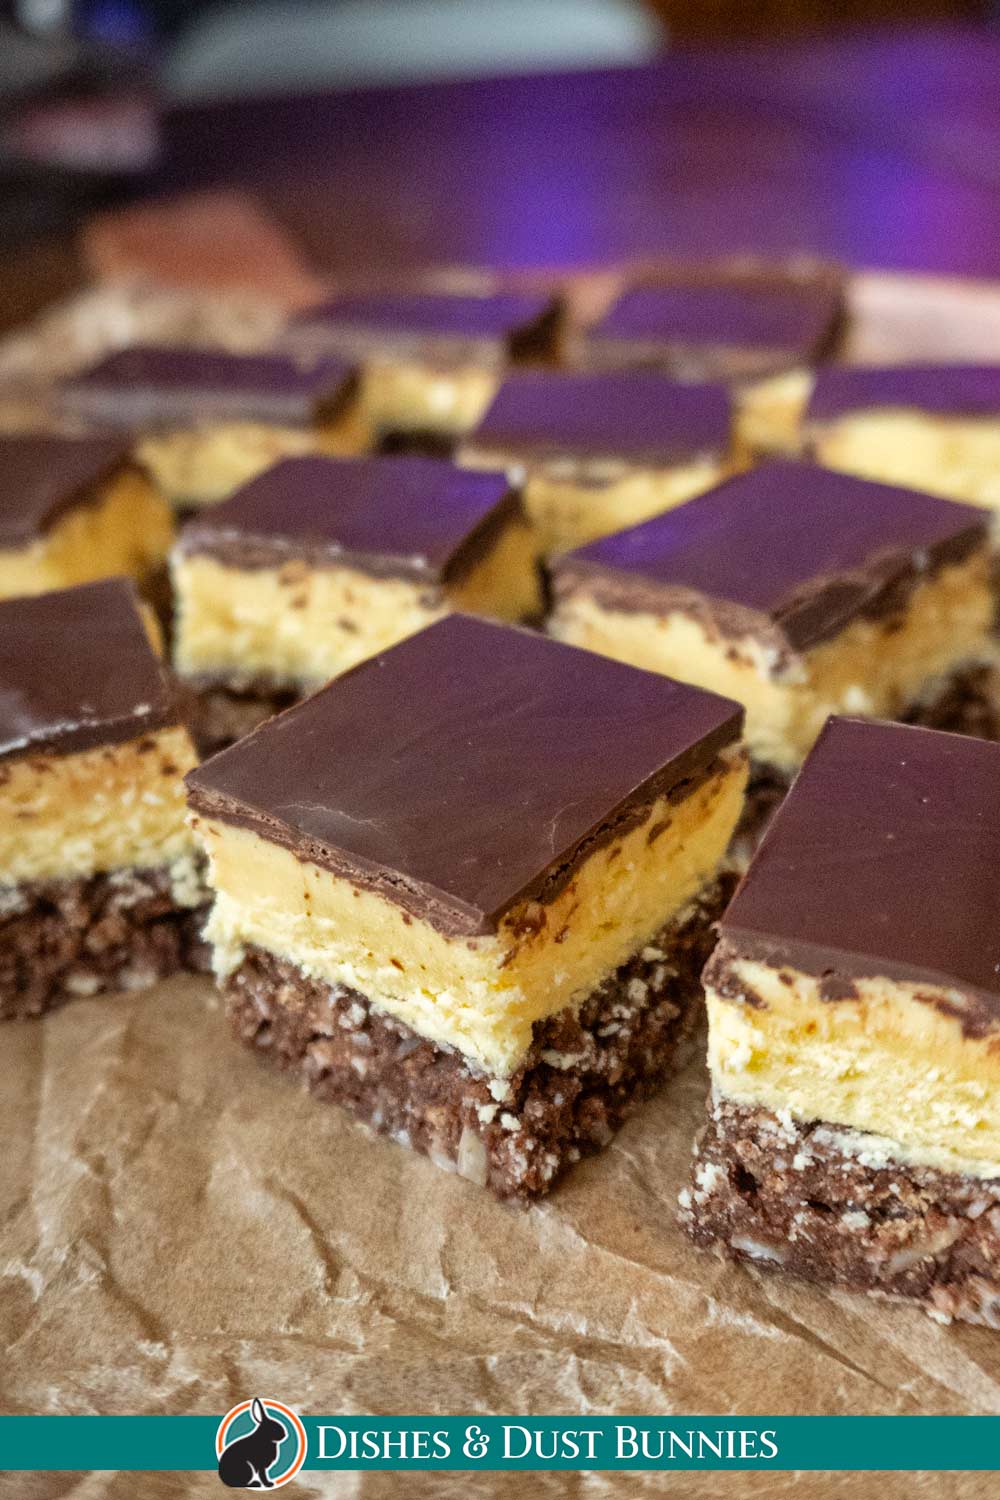
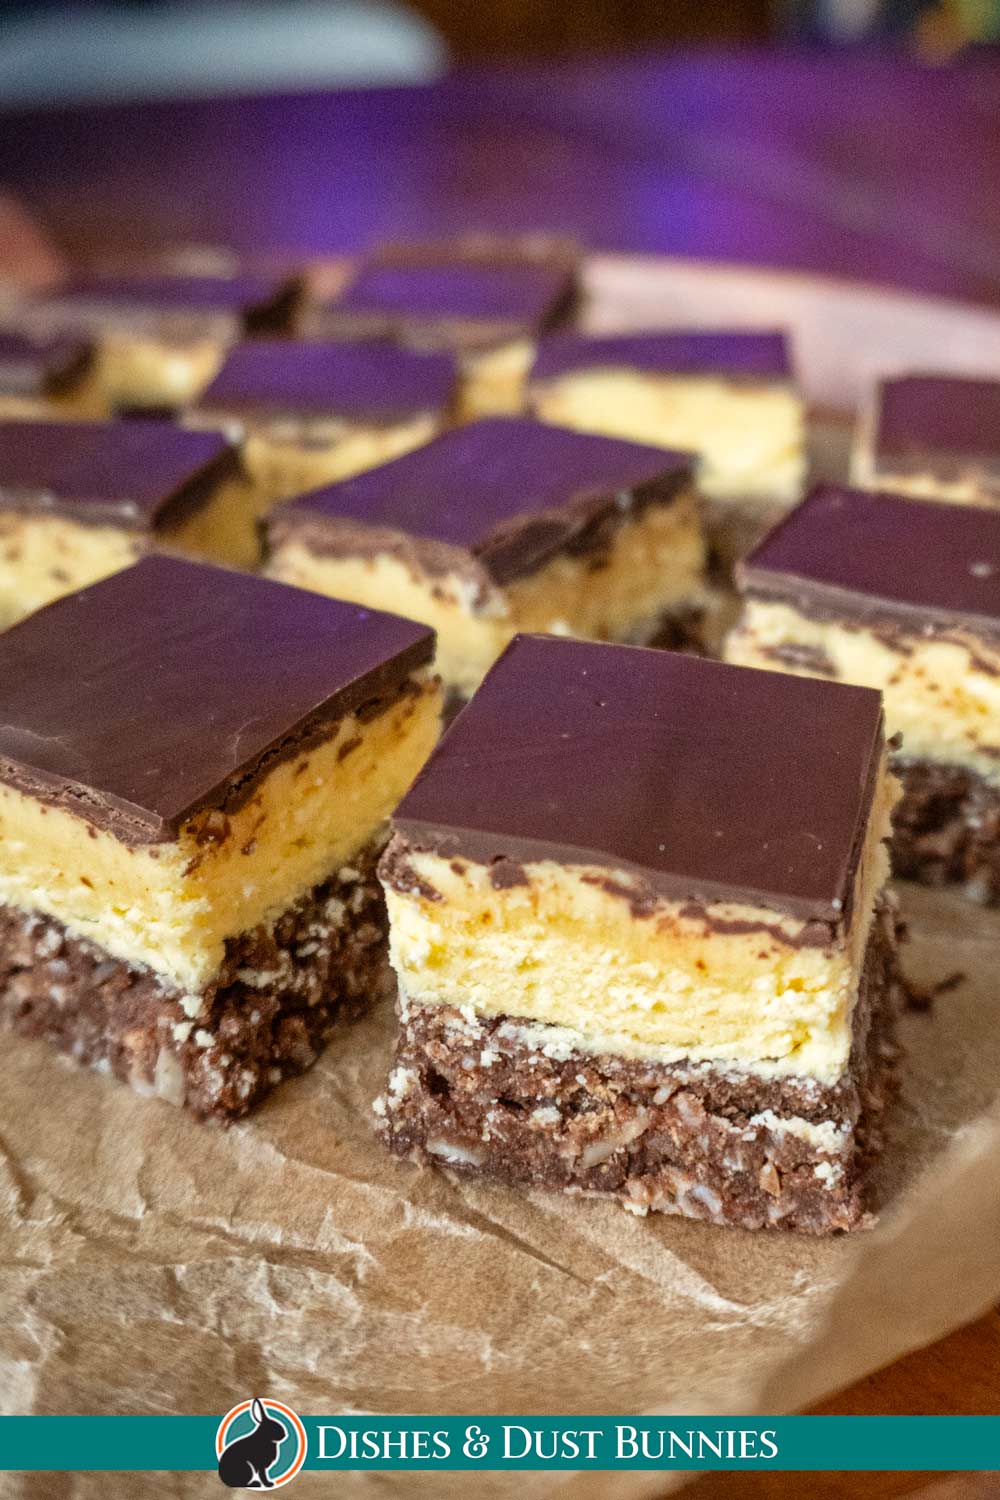
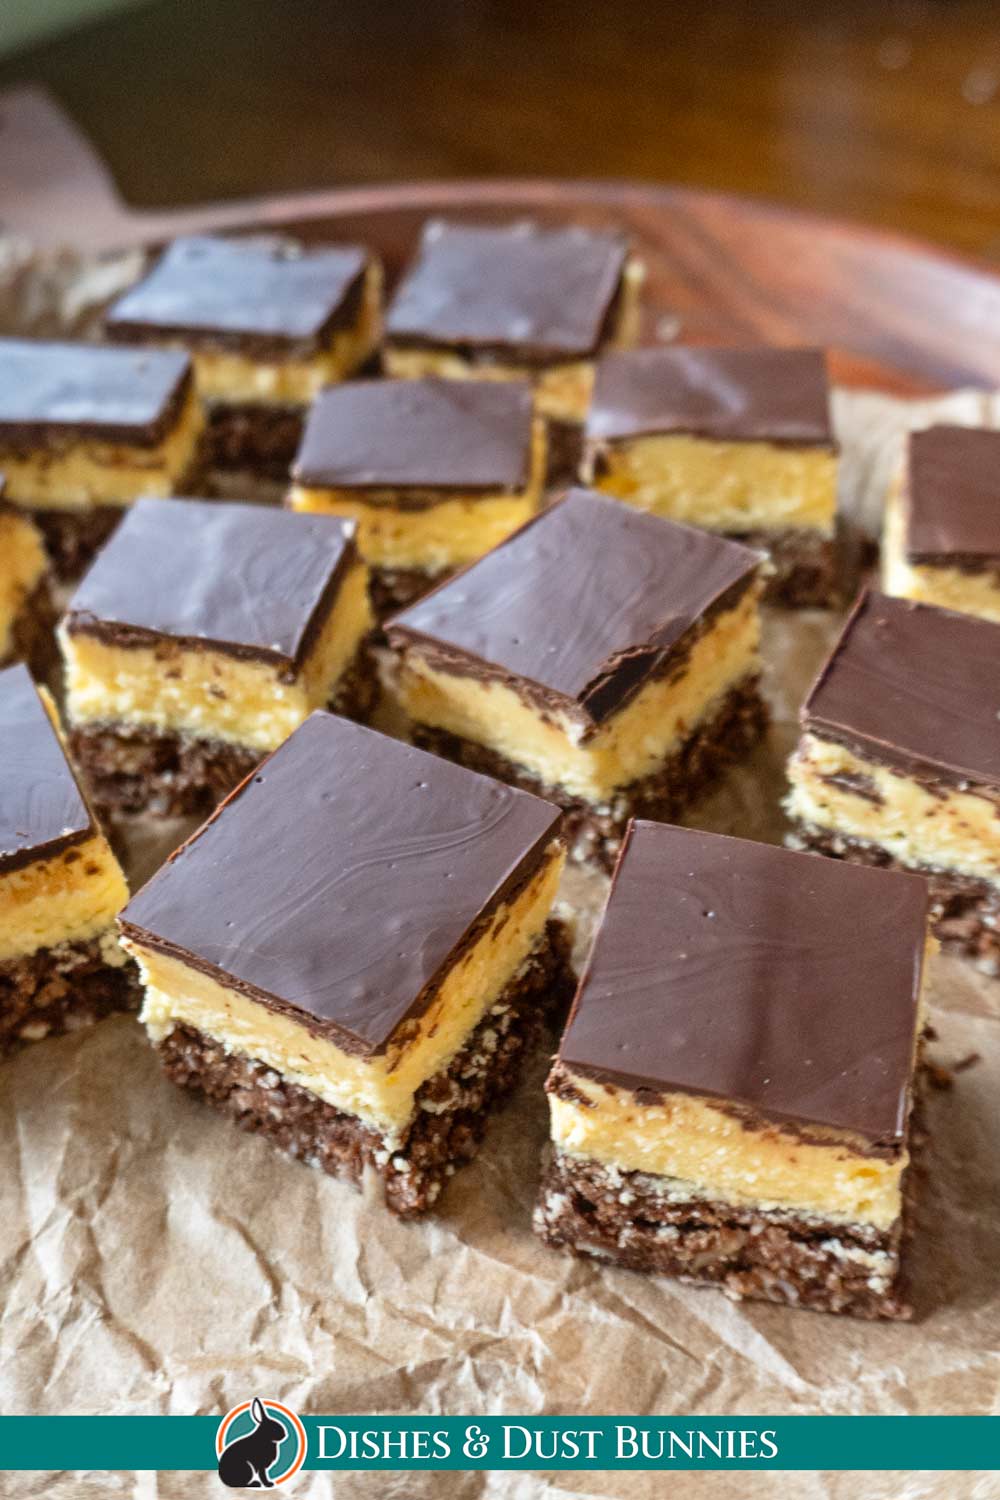
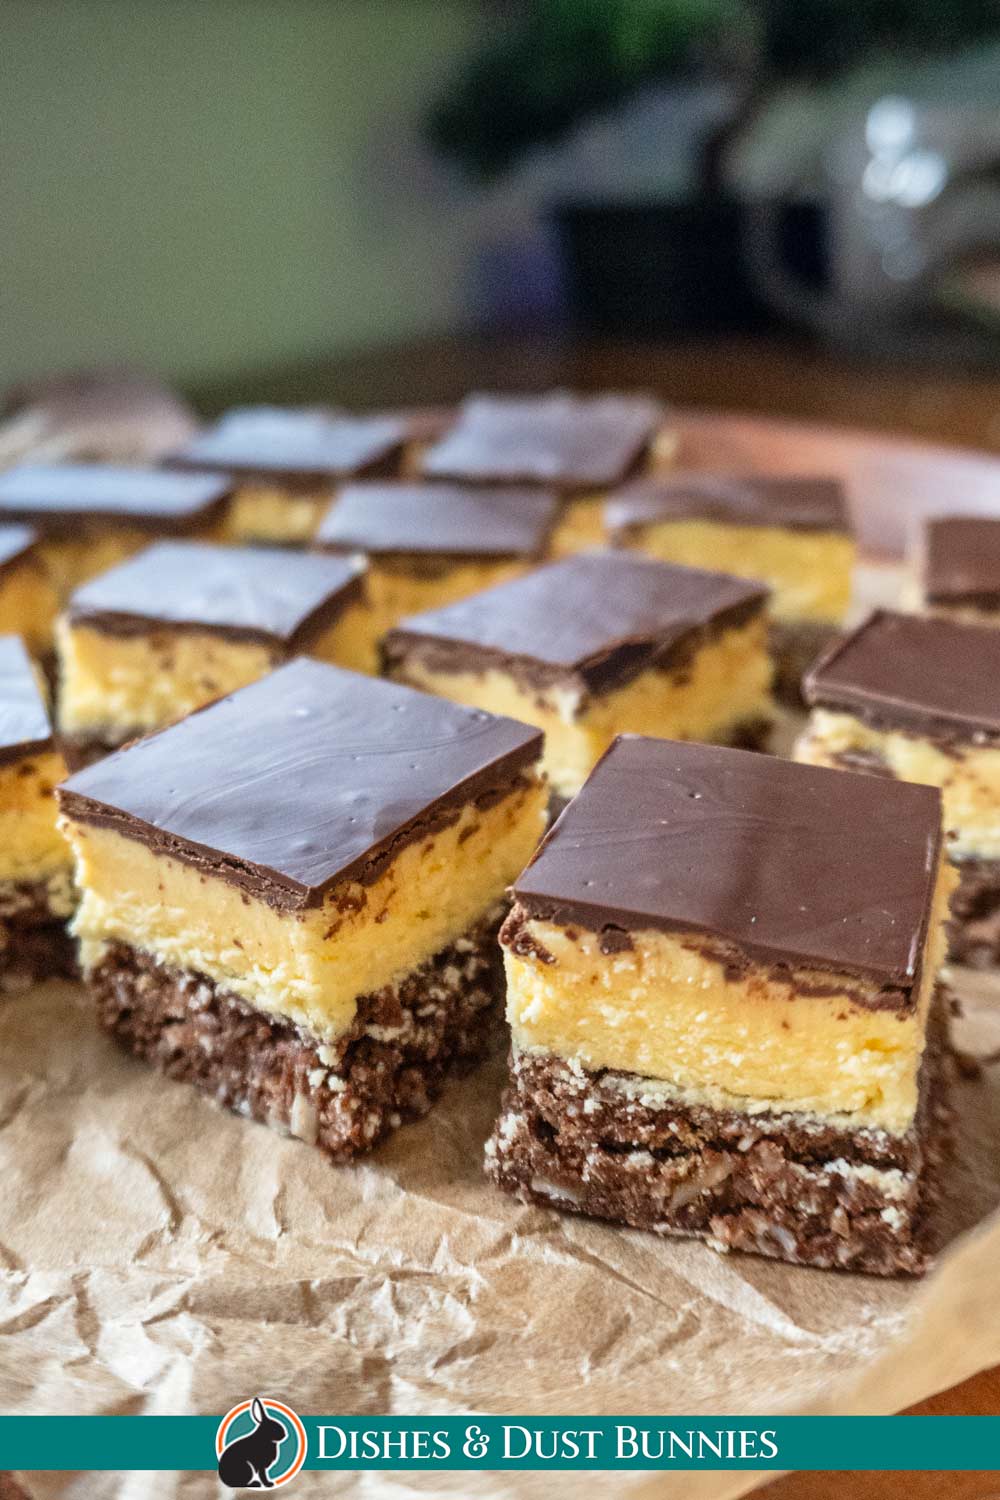
If you're craving something sweet, rich, and satisfying, look no further than Nanaimo Bars! These decadent bars come with three irresistible layers—starting with a crunchy graham cracker crumb base, followed by a creamy custard filling, and topped with a smooth semi-sweet chocolate layer. Plus, they’re no-bake, making them a perfect treat to whip up any time you need a sweet fix without turning on the oven.
Whether you're hosting a gathering or indulging at home, Nanaimo Bars are a must-try!
What are Nanaimo Bars?
Nanaimo Bars are a famous Canadian dessert, originating from the city of Nanaimo in British Columbia. Their three distinct layers offer a delightful contrast in texture and flavor—crunchy on the bottom, creamy in the middle, and chocolatey on top. These bars have become a beloved treat across Canada and beyond, thanks to their satisfying combination of flavors.
You might even come across them in the U.S., though they’re sometimes called custard bars. But no matter what name they go by, Nanaimo Bars are known for their rich, layered goodness!
What Are Nanaimo Bars Made Of?
These bars are made from easy-to-find ingredients. The bottom layer features graham cracker crumbs, shredded coconut, and cocoa powder, with optional chopped almonds or walnuts for extra crunch. The middle layer boasts a smooth, buttery custard filling, made with Bird’s custard powder and powdered sugar. Finally, the top layer is a luscious coating of melted semi-sweet chocolate combined with butter for a glossy finish.
Be sure to see the recipe card at the bottom of the post for full ingredients & instructions!
How to Make Nanaimo Bars – Overview
You can find the full recipe details, including ingredient amounts and the full instructions in the recipe card at the bottom of this post, but first, here's a quick overview of how to make homemade Nanaimo bars from scratch!
To start, mix melted butter, sugar, cocoa powder, and a beaten egg until everything’s smooth and thick. Add in a splash of vanilla, graham cracker crumbs, shredded coconut, and nuts if you like, then press it all into the bottom of an 8×8-inch pan and pop it in the fridge to set.
Next comes the creamy middle layer. Beat together butter, powdered sugar, custard powder, and a little cream until it’s nice and fluffy. Spread this over the chilled base and return it to the fridge for another quick chill.
Finally, melt some chocolate with butter and pour it over the custard layer, spreading it out for a smooth finish. After one more chill, your Nanaimo Bars are ready to slice. For neat, clean cuts, run a knife under warm water between slices. Then, enjoy every delicious layer!
Recipe Variations & Substitutions
- Nut-Free Option: Skip the nuts if you prefer a nut-free treat.
- Pudding Substitute: Use vanilla pudding mix if you don’t have custard powder.
- Chocolate Twist: Swap semi-sweet chocolate with milk or bittersweet chocolate for a different flavor.
Do Nanaimo Bars Contain Raw Eggs?
If you’ve ever wondered whether Nanaimo Bars contain raw eggs, rest assured—they don’t! The egg used in the bottom layer is gently cooked as it’s stirred into the warm butter and cocoa mixture. This not only thickens the base but also makes it perfectly safe to eat.
To be extra sure, you can use a food thermometer to check that the mixture reaches at least 160°F (71°C), which is the safe temperature for eggs. The trick is to stir continuously, so everything comes together smoothly without any lumps. It’s just another little step that makes Nanaimo Bars so wonderfully rich and delicious!
Can You Make Nanaimo Bars Ahead of Time?
Absolutely! Nanaimo Bars store well and can be made ahead. Refrigerate for up to 5 days or freeze for 2 months. If frozen, let them sit at room temperature for a few minutes before serving for easier slicing.
Storage
- In the Fridge: Store in an airtight container for up to 5 days.
- In the Freezer: Freeze for up to 2 months. Wrap each bar or layer with parchment paper.
What to Serve with Nanaimo Bars
Enjoy Nanaimo Bars with a cup of coffee, tea, or hot chocolate. You can also pair them with other no-bake treats like Chocolate Peanut Butter Rice Crispy Bars!
Other Recipes You’ll Enjoy
If you’re enjoying these Nanaimo Bars, you’ll love exploring other recipes in categories like no-bake desserts, savory snacks, and comforting main dishes. There are also plenty of international flavors, family-friendly dinners, and hearty breakfast ideas to discover.
Nanaimo Bars
- Total Time: 2 hours 20 minutes
- Yield: 16 bars 1x
Ingredients
Bottom Layer:
- ½ cup unsalted butter, melted
- ⅓ cup granulated sugar
- 4 tbsp unsweetened cocoa powder
- 1 large egg, beaten
- 1 tsp vanilla extract
- 1 ¾ cups graham cracker crumb
- ¾ cup shredded coconut
- ⅓ cup chopped almonds or walnuts (optional)
Middle Layer:
- ⅔ cup unsalted butter, softened
- 1 ¾ cups powdered sugar
- 3 tbsps vanilla custard powder
- 4 tbsps heavy cream
Top Layer:
- 5 oz semi-sweet chocolate, chopped
- 1 ½ tbsp unsalted butter

Instructions
Prepare the Bottom Layer:
- In a bowl, mix the melted butter, sugar, and cocoa powder until combined.
- Add the beaten egg slowly while stirring. The heat from the melted butter will thicken the mixture.
- Stir in vanilla, graham cracker crumbs, shredded coconut, and walnuts (if using). Press this mixture firmly into the bottom of an 8×8-inch pan. Refrigerate for 30 minutes to set.
Make the Middle Layer:
- Beat together (best to use a stand mixer using the whisk attachment or a hand mixer) the softened butter, powdered sugar, custard powder, and heavy cream until smooth and fluffy.
- Spread the custard mixture evenly over the chilled bottom layer. Refrigerate for another 30 minutes.
Finish with the Top Layer:
- Melt the chopped chocolate with butter in a heatproof bowl over simmering water (or in the microwave).
- Pour the melted chocolate over the middle layer, spreading it evenly. Chill the bars for at least 1 hour or until fully set.
Slice and Serve:
-
For clean cuts, allow the bars to set completely in the fridge, then use a warm knife (run under hot water and dry). Repeat this between cuts to keep the edges neat and slice them into 16 even squares.
Notes
Pan Size: This recipe is designed for an 8×8-inch square pan. Using a different size pan may affect the thickness of the layers.
Middle Layer Consistency: Be sure to beat the middle layer well until it becomes light and fluffy. This usually takes 2–3 minutes with a whisk attachment on a stand mixer or a hand mixer.
Chocolate Layer Tip: To spread the chocolate layer easily, pour the warm melted chocolate onto the middle layer and tilt the pan gently to let it flow evenly. Once spread, lift the pan slightly and drop it lightly onto the table a couple of times to remove air bubbles and create a smooth, even top.
Note on the use of Eggs: The eggs in this recipe are gently cooked by the residual heat of the melted butter and cocoa mixture as you stir them in. This process thickens the base layer while ensuring the eggs are safe to eat. To be extra sure, you can use a food thermometer to check that the mixture reaches at least 160°F (71°C), the safe temperature for eggs. Stir continuously to avoid any curdling.
- Prep Time: 20 min
- Chill Time:: 2 Hours
- Category: Dessert
- Method: No Bake
- Cuisine: Canadian