Chicken and rice stuffed peppers are filled with a delicious combination of chicken, rice, mushrooms, tomato sauce, garlic, onions and other flavorful seasonings. This stuffed peppers recipe is simple, easy to make and is so customizable that you can use it as a starting off point for your own personal delicious recipes.
Pretty much any food is good when it’s stuffed with a nice filling mixture, right?
Yes, indeed!
In this post, you're going to learn to make my wickedly delightful chicken and rice stuffed peppers!
I hope you enjoy this recipe! ❤️ If you give it a try, please let me know how it turned out for you in the comments section at the bottom of the page or share a pic of your om noms on Instagram and tag @dishesanddustbunnies! ❤️
If you enjoy this recipe, you'll also love these delicious puff pastry sausage rolls from Cooking with Curls!
*This post has been updated from an earlier version to include more hints, tips and a few tweaks to the original recipe to make it even more scrumptious!*
Are Stuffed Peppers Italian or Mexican?
The stuffed pepper is a dish that can be found in the cuisines of many cultures. They serve Italian stuffed peppers in Italy and they stuff peppers in Mexico too. Stuffed bell peppers are said to have originated in Italy, but it’s also a popular dish in Mexico.
However, there are some differences. The Italians and Mexicans prepare the rice differently, in Italian stuffed peppers the rice is cooked in broth before it’s used to stuff the peppers. Not in Mexico where the rice is cooked with the other ingredients right inside the pepper.
Be sure to see the recipe card at the bottom of the post for full ingredients & instructions!
Ingredients used to make Stuffed Peppers and Recipe Variations
There are a few common ingredients used in most stuffed peppers recipes, but for the most part, these options are yours to play around with and customize to your liking to make the best recipe for stuffed peppers for you! Below, I go over the ingredients I used in my version and give a few suggestions for how to customize it.
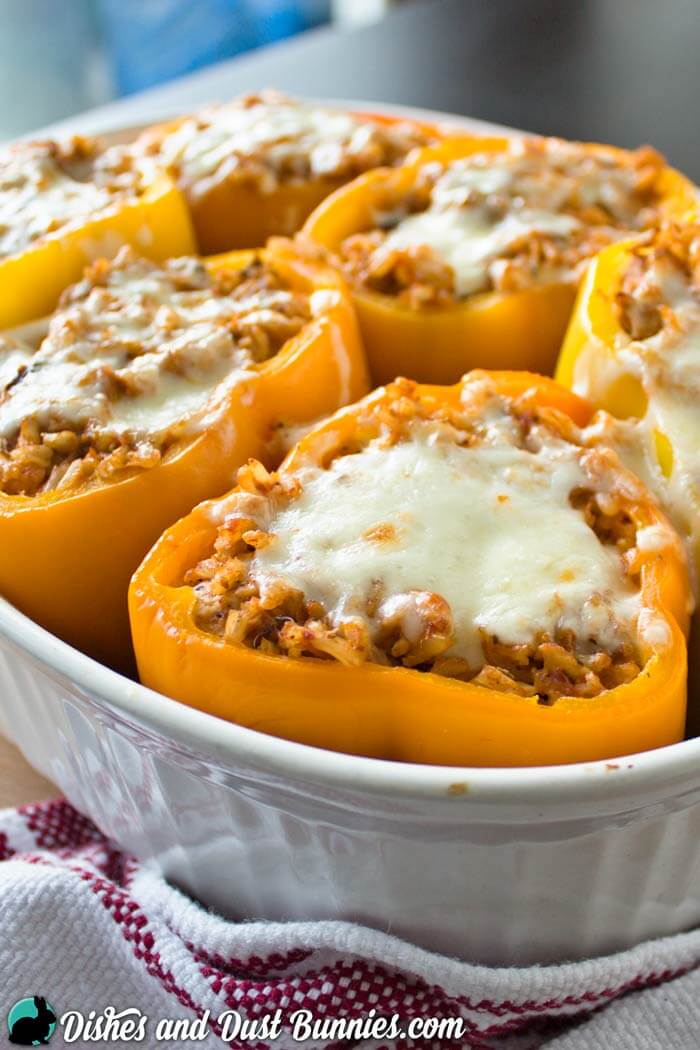
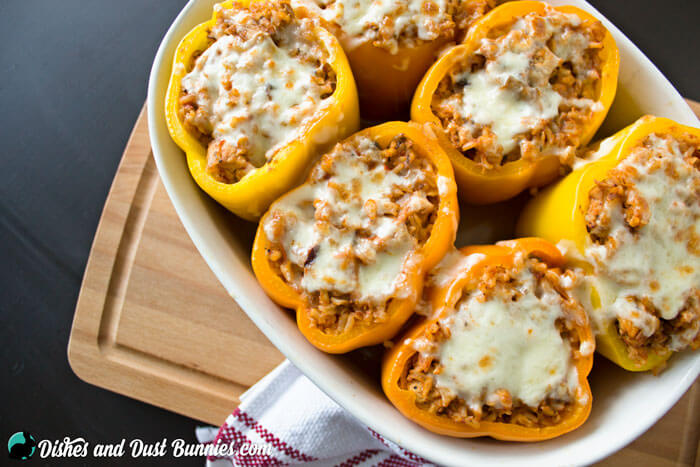
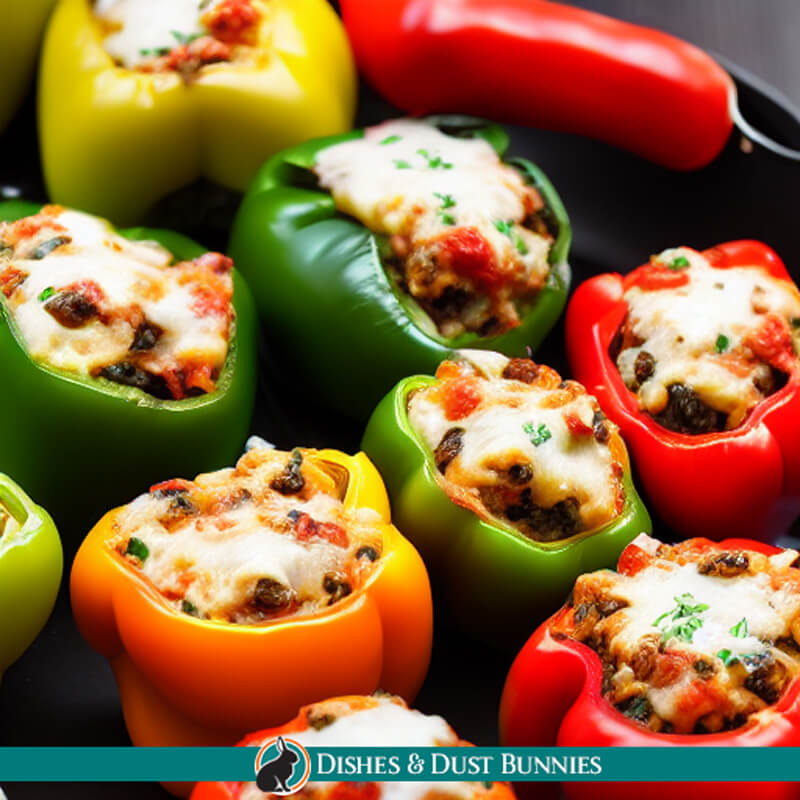
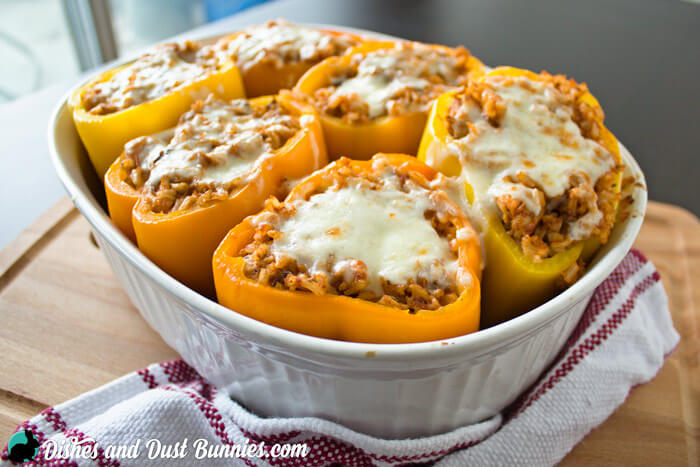
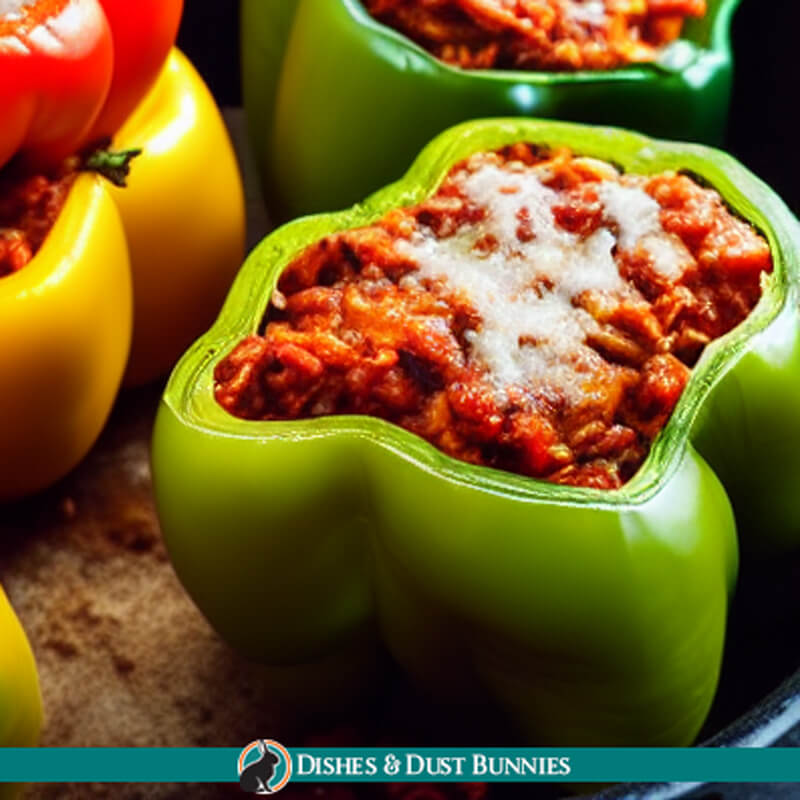
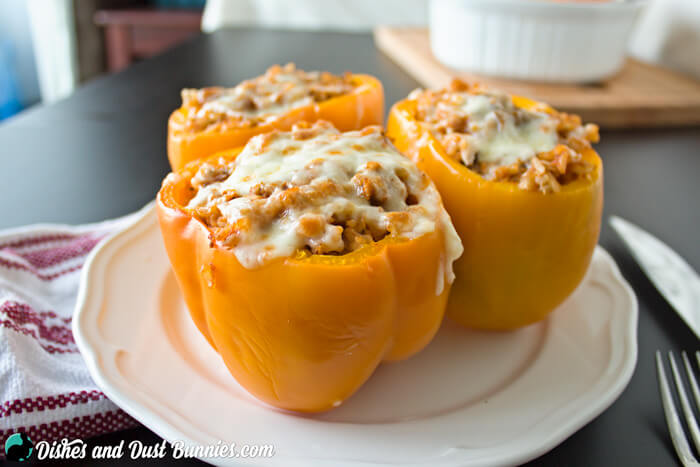
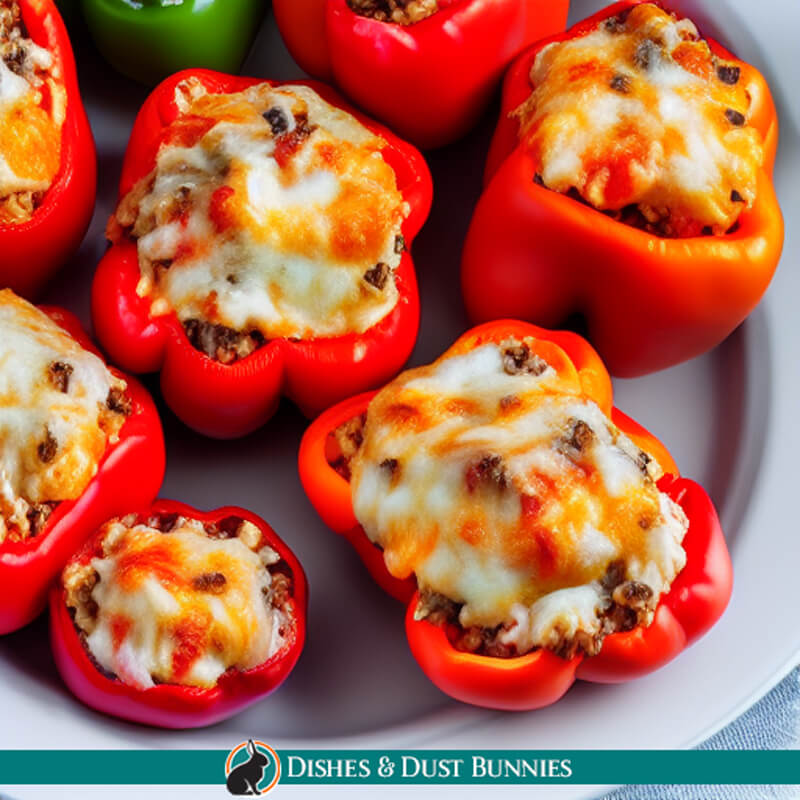
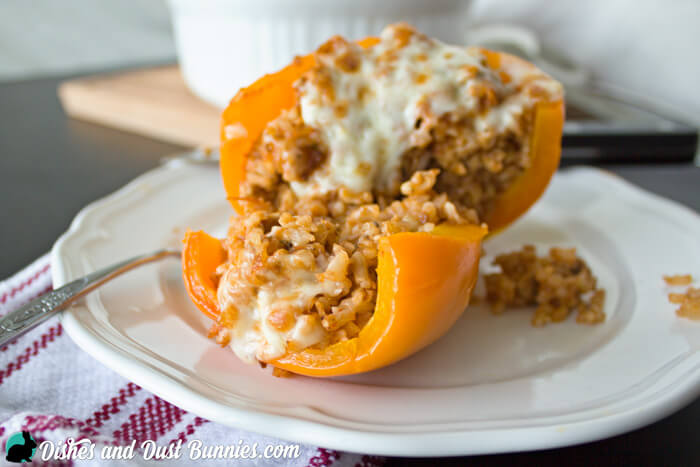
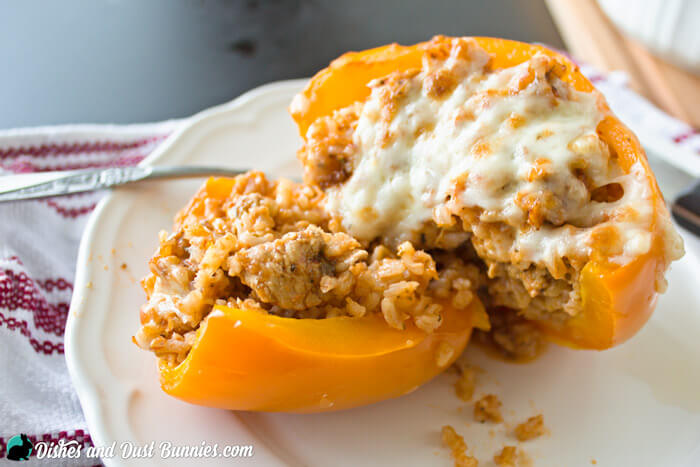
Peppers – For this recipe, you’re going to need some fresh red, orange or yellow bell peppers. When I made this recipe, the only bell pepper available in the grocery store were the orange bell peppers so that's what you see in the pics! Stuffed green peppers are the traditional way of doing things but they are not my personal preference. Green bell peppers are the least sweet and I find that any other color bell pepper holds extra sweetness. Red bell peppers, orange or yellow ones work most perfectly with the savory chunks of chicken breast.
No matter what color of pepper you use, get those bell peppers stuffed and they make for a scrumptious entrée or appetizer. No matter what you do, stick with bell peppers as they're just the perfect size for stuffing and they have a milder flavor that won’t overpower the other ingredients. Bell peppers make for the best stuffed peppers!
Rice – I used brown rice for this recipe because its texture goes so deliciously well with all the other ingredients. If you'd like, you can definitely try using other kinds of rice (like basmati or long grain white rice) with this recipe as well. If you're trying to cut down on carbs you can replaced the brown or white rice with quinoa or couscous or cauliflower rice.
Do I use cooked rice or uncooked? For this recipe, it's important to use cooked rice rather than uncooked. If you use uncooked rice, it will absorb too much of the liquid from the other ingredients and the filling will be dry. Precooked or leftover rice is best.
Meat/Protein – I used chopped chicken breast in this recipe but you may find a beef filling to be the way you want your peppers stuffed. You can use chopped chicken but you can also try another meat mixture, such as ground chicken, ground beef, beef mixture, ground pork, sausage, Italian sausage or ground turkey.
Do I use pre-cooked meat or raw? For this recipe, the stuffing ingredients, including the meat, are cooked together in a large frying pan before adding them to the peppers. I have seen some recipes that stuff the peppers with raw meat, then cook – I haven't tried cooking it this way myself, so, unfortunately, I can't give an opinion. I'll try this method in a future post, so please stay tuned! 😋
Veggies – I used mushrooms in this recipe, but you could also add carrots, celery, corn, diced tomatoes, etc. Diced zucchini compliments the flavors very well.
Cheese – I loooovvveeee cheese on anything! haha
For this recipe, I put some mozzarella on top of my stuffed bell peppers towards the end of cooking. Parmesan cheese, cheddar cheese and Monterey Jack are popular alternatives but you can try any cheese you like.
Seasonings – Basic seasonings like diced onions and fresh garlic add wonderful flavor to stuffed bell peppers, along with some salt and pepper (ideally ground black pepper), Italian seasoning and smoked paprika. Fresh parsley and fresh basil make for good veggie seasonings. This is the time where you decide if you want a mild or spicy stuffed pepper, spiciness could overpower the other flavors which is a risk but you can use hot sauce or chili flakes to give your stuffed bell peppers a bit of a kick.
Tomato Sauce – Tomato sauce is almost always used in stuffed bell peppers recipes and adds a wonderful flavor to the dish. Marinara sauce is nice in particular but you can choose any kind of pasta sauce or even canned tomatoes.
Seriously though, you can get your bell peppers stuffed with just about any kind of ingredient you can imagine, and it will be an absolute delight. 🙂
I hope you enjoy this peppers recipe as much as my family does, and please feel free to use this recipe as a sort of starting point to make your own stuffed bell pepper creations!
Be sure to see the recipe card at the bottom of the post for full ingredients & instructions!
How to make Stuffed Peppers – Overview
You can find the full details and ingredient amount for this recipe at the bottom of the page, but first here is an overview of how to make stuffed peppers.
To begin; prepare the peppers by slicing the tops off and scooping out the seeds and ribs (your peppers can be halved lengthwise too if you prefer) Don’t throw those pepper tops away! You can remove the stems and chop up the pepper tops, and put them right in with the filling to cook with the rest of the ingredients. I don’t like to waste anything. 🙂
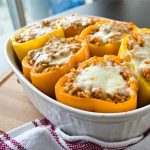
Set the “pepper cups” (as my son calls them) into a baking dish with a little water in the bottom. Set this aside while the oven preheats and while you work on making your filling.
Next, in a large skillet on medium high heat, the stuffing ingredients (chicken, diced onion, mushrooms, chicken stock, tomato sauce, garlic, Italian seasoning, paprika, salt and pepper) are cooked in a skillet or frying pan with a little olive oil. Add the rice to the pan and combine. Once your rice mixture filling is ready, you just have to scoop some into each of the peppers. I recommend filling the peppers up about ¾ full, but you can probably get away with overstuffing them a little. 🙂
Nothing wrong with a little extra stuffin’! 😉
Once you have your peppers all filled up with that delicious savory filling, cover your baking dish tightly with some aluminum foil. Now it's time to bake the peppers! When you bake the peppers it’s super important to make sure that the foil is pressed tightly around the edges of the baking dish so that the peppers will cook properly.
Then when the peppers are all finished baking, remove the foil from the baking dish and sprinkle the tops of those delicious looking peppers with some freshly shredded mozzarella cheese. Pop the peppers back into the oven for about five minutes under the broiler setting so that your cheese melts and starts to get nice and bubbly.
MMmmm MMmmm bubbly cheese!
My Peppers wobble and won't stand up.
How do I fix that?
When choosing your peppers at the grocery store, make sure to find some that have a relatively sturdy bottom, so they stand up easily when you cook them in the baking dish.
If you do find that your peppers are wobbly, you can cut a little off the bumpy parts at the bottom of the pepper to even it out, so it will stand up better. Be careful not to slice the bottoms too deep, as creating a hole in the bottom will cause those delicious juices from the filling to seep out. You want to keep the yumminess contained! lol
Why are my peppers watery?
Do You Have to Boil or Pre-cook the Peppers Before Stuffing Them?
If the peppers haven't been pre-cooked before stuffing, sometimes they can become watery. Peppers naturally have a lot of water content so when they cook, a lot of the liquid will release.
For this recipe, you do not need to pre-cook your peppers. I find that without pre-cooking them, they have a much nicer texture and a bit of a crunch, which I really enjoy. Pre-cooked peppers will be more tender and much softer in the finished recipe.
If you'd like to pre-cook your peppers, you can do so by steaming them for about 10 minutes in a large pot with the lid on. This will help release some of the excess moisture in the peppers. Make sure you allow them to cool for a bit before stuffing, so you don't burn yourself on the hot steam!
Should you cover stuffed peppers when baking?
Covering stuffed bell peppers with aluminum foil while they bake helps the filling cook evenly and prevents the cheese from drying out or burning. If you don't have a lid that fits your baking dish, you can use foil.
Uncover your stuffed bell peppers about 5 minutes prior to finishing them in order to sprinkle the cheese overtop and ensure that the cheese is melted.
Do you put eggs in stuffed peppers?
No, you don't need to put eggs in stuffed peppers.
How to freeze Stuffed Peppers
To freeze your stuffed bell peppers, prepare them according to the recipe at the bottom of the page as usual. Freeze them individually, wrapped in aluminum foil or all together in a baking dish.
How to reheat frozen stuffed peppers: thaw them overnight in the fridge, then bake at 350°F in the oven until heated through.
How long are Stuffed Peppers good for?
When stored in the fridge, stuffed bell peppers will be good for 3-5 days.
When stored in the freezer, stuffed bell peppers will be good for about 3 months.
What to Serve with Stuffed Peppers
You can serve these stuffed bell peppers as an appetizer or even as a side dish, depending on the meal you’re planning. Personally, I'd serve stuffed bell peppers with just about anything since they're so delicious, but here are a few ideas and some suggestions to get you started:
- Salads; green leafy salads
- Cheese platter
- Potatoes; mashed, fried, baked, etc
- Sweet potato fries
- Rice
- Corn Fritters
- Green beans
- Roasted Veggies; zucchini, yellow squash, artichokes, cauliflower, broccoli, carrots, mushrooms, etc
- Bread; especially nice crusty bread
- Soups
Other Recipes You'll Enjoy
Chicken and Rice Stuffed Peppers
- Total Time: 1 hour 20 minutes
- Yield: 6 Servings 1x
Ingredients
- 6 bell peppers, tops sliced off (see my note about peppers at the bottom of the recipe)
- 3 cups cooked brown rice
- 1 lb, chicken breast, chopped
- ½ medium onion, finely chopped
- 1 cup sliced mushrooms
- 1 cup chicken stock
- 1 cup tomato sauce
- 2 cloves of garlic, finely chopped
- ½ tbsp Italian seasoning
- ¼ tsp smoked paprika
- ½ tsp salt
- 1 tsp pepper
- 1 tbsps cooking oil
- 1 cup water
- 1 cup mozzarella, shredded

Instructions
- Preheat the oven to 375°F.
- Pour 1 cup of water into a 2 quart glass baking dish.
- Into the baking dish, arrange the six bell peppers so that they are standing. The peppers should be sitting in the water. Set the baking dish aside while you prepare the filling.
- In a large frying pan for skillet, heat the cooking oil on medium heat.
- Add the onions and mushrooms to the pan along with the salt. Stir this around and cook for about 5 minutes or until everything is softened in the onions begin to look translucent.
- Add the garlic to the pan and give it a stir to combine with the onions and mushrooms.
- To the pan, add the pepper, smoked paprika and Italian seasoning. Stir to combine well.
- Allow this to cook for five minutes more and then add the chicken to the pan.
- Allow the chicken to cook and brown up in the pan with the other ingredients for about five minutes, while stirring a couple times.
- Next add the chicken stock and the tomato sauce. Combine well with the ingredients of the pan.
- Turn down the heat and add the cooked brown rice to the pan. Stir everything together and allow to simmer and reduce for about 10 minutes.
- Fill each pepper a little more than 3/4 full using the rice and chicken mixture.
- Cover the baking dish tightly with aluminum foil and place into the oven to bake for 45- 60 minutes. Make sure that the foil makes a tight seal so that the peppers cook properly.
- Once the peppers have finished cooking, remove them from the oven and sprinkle mozzarella over each.
- Place the peppers back into the oven uncovered and turn on the broiler setting. Broil for about 5 minutes to melt the cheese. Cheese should bubble up a bit and get a little golden color.
- Enjoy!
Notes
For best results, I like to use yellow, orange or red bell peppers with this recipe.
Don’t throw those pepper tops away! You can remove the stems and chop up the pepper tops, and put them right in with the filling to cook with the rest of the ingredients.
If you find that your peppers are wobbly and don't stand up, you can cut a little off the bumpy parts at the bottom of the pepper to even it out, so it will stand up better. Be careful not to slice the bottoms too deep, as creating a hole in the bottom will cause those delicious juices from the filling to seep out. You want to keep the yumminess contained! lol
For this recipe, you do not need to pre-cook your peppers. I find that without pre-cooking them, they have a much nicer texture and a bit of a crunch, which I really enjoy. Pre-cooked peppers will be more tender and much softer in the finished recipe. If you'd like to pre-cook your peppers, you can do so by steaming them for about 10 minutes in a large pot with the lid on. This will help release some of the excess moisture in the peppers. Make sure you allow them to cool for a bit before stuffing so you don't burn yourself on the hot steam!
- Prep Time: 20 mins
- Cook Time: 60 mins
- Category: Entree